Using RFIs
Last updated: March 16, 2026
Overview
RFIs help teams formally ask, track, and resolve questions that arise during construction—but traditional RFI logs often live disconnected from the drawings they impact.
In Constructable, RFIs are tied directly to sheets. Questions, responses, comments, and markups all live together in one place, with the ability to pin RFIs to exact drawing locations. This article walks through how to create and manage RFIs, assign responsibility, collect and respond to answers, and close and distribute RFIs once they’re resolved.
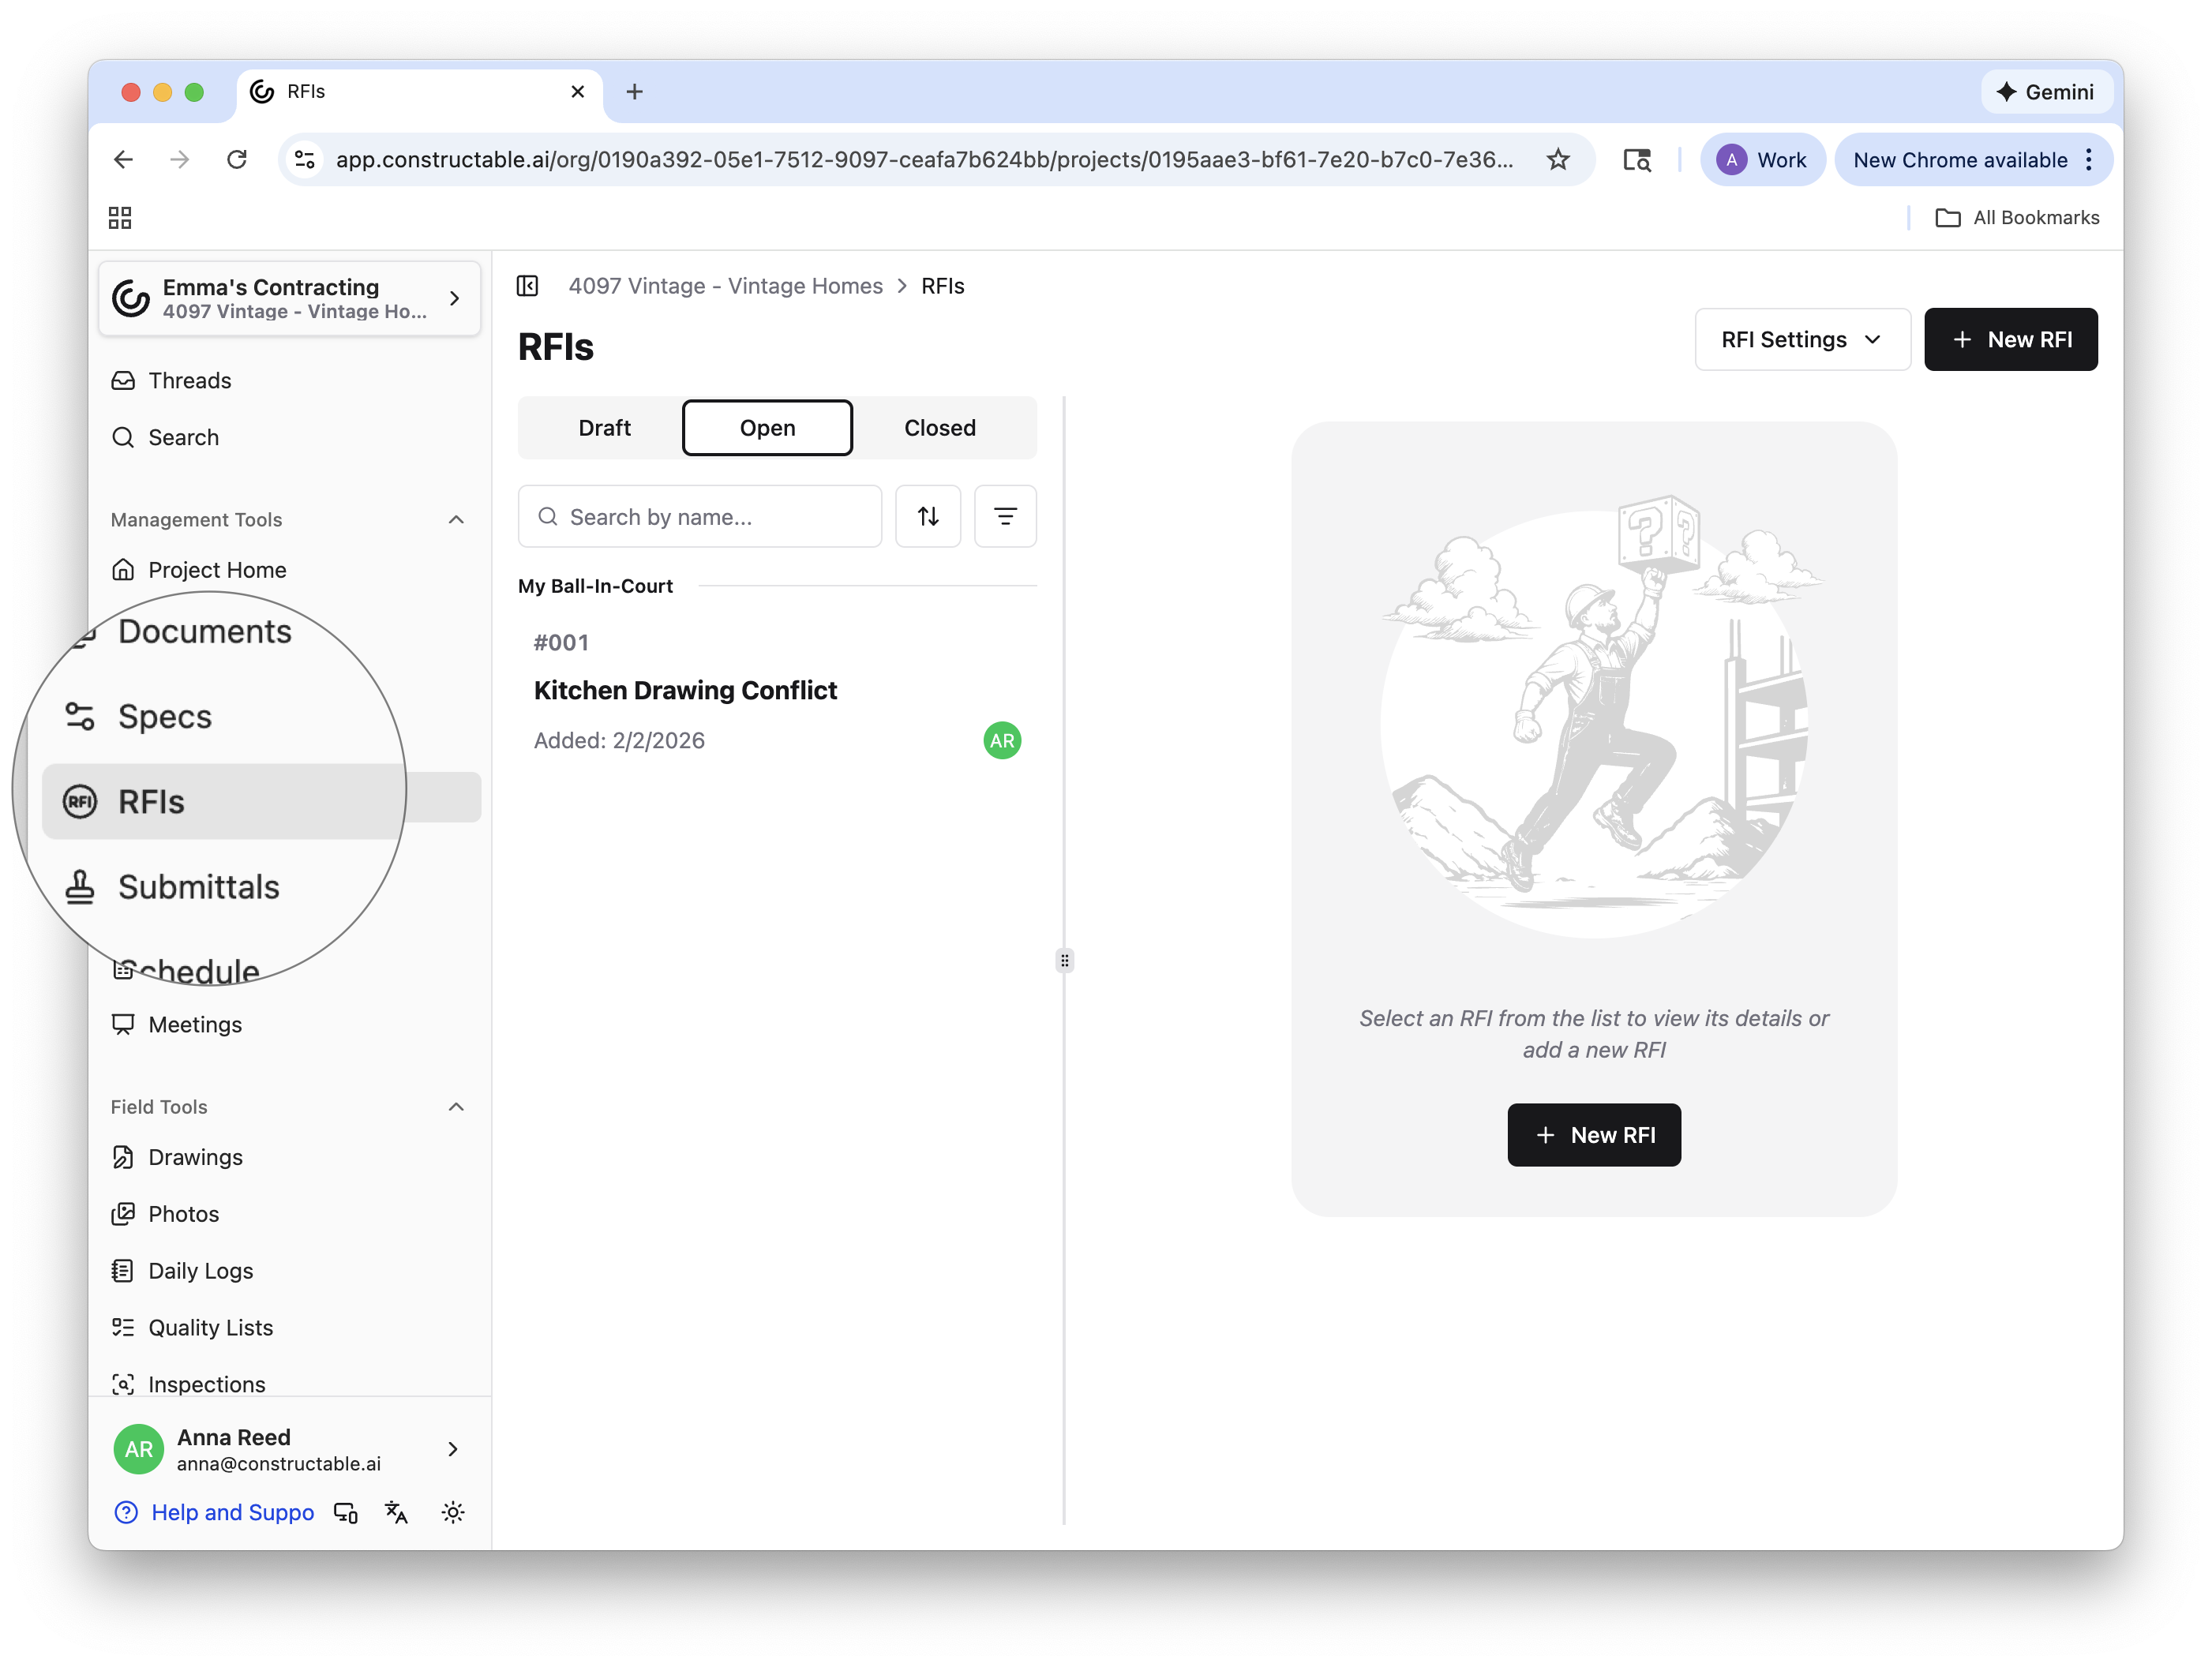
What You Can Do with RFIs
Ask and track formal project questions related to drawings, specs, or design intent
Pin questions directly to drawings to keep context tied to a specific location
Assign responsibility and track ball-in-court so questions keep moving
Collect and distribute official responses to keep decisions clear and documented
RFIs Workflow
To create a new RFI in the main workflow, click the + New RFI button in the upper-right corner of the page. Give the RFI a name, and select Create Draft. (Don't worry, you can always change the name later!) This will open your new draft RFI—from here, fill out all pertinent information fields.
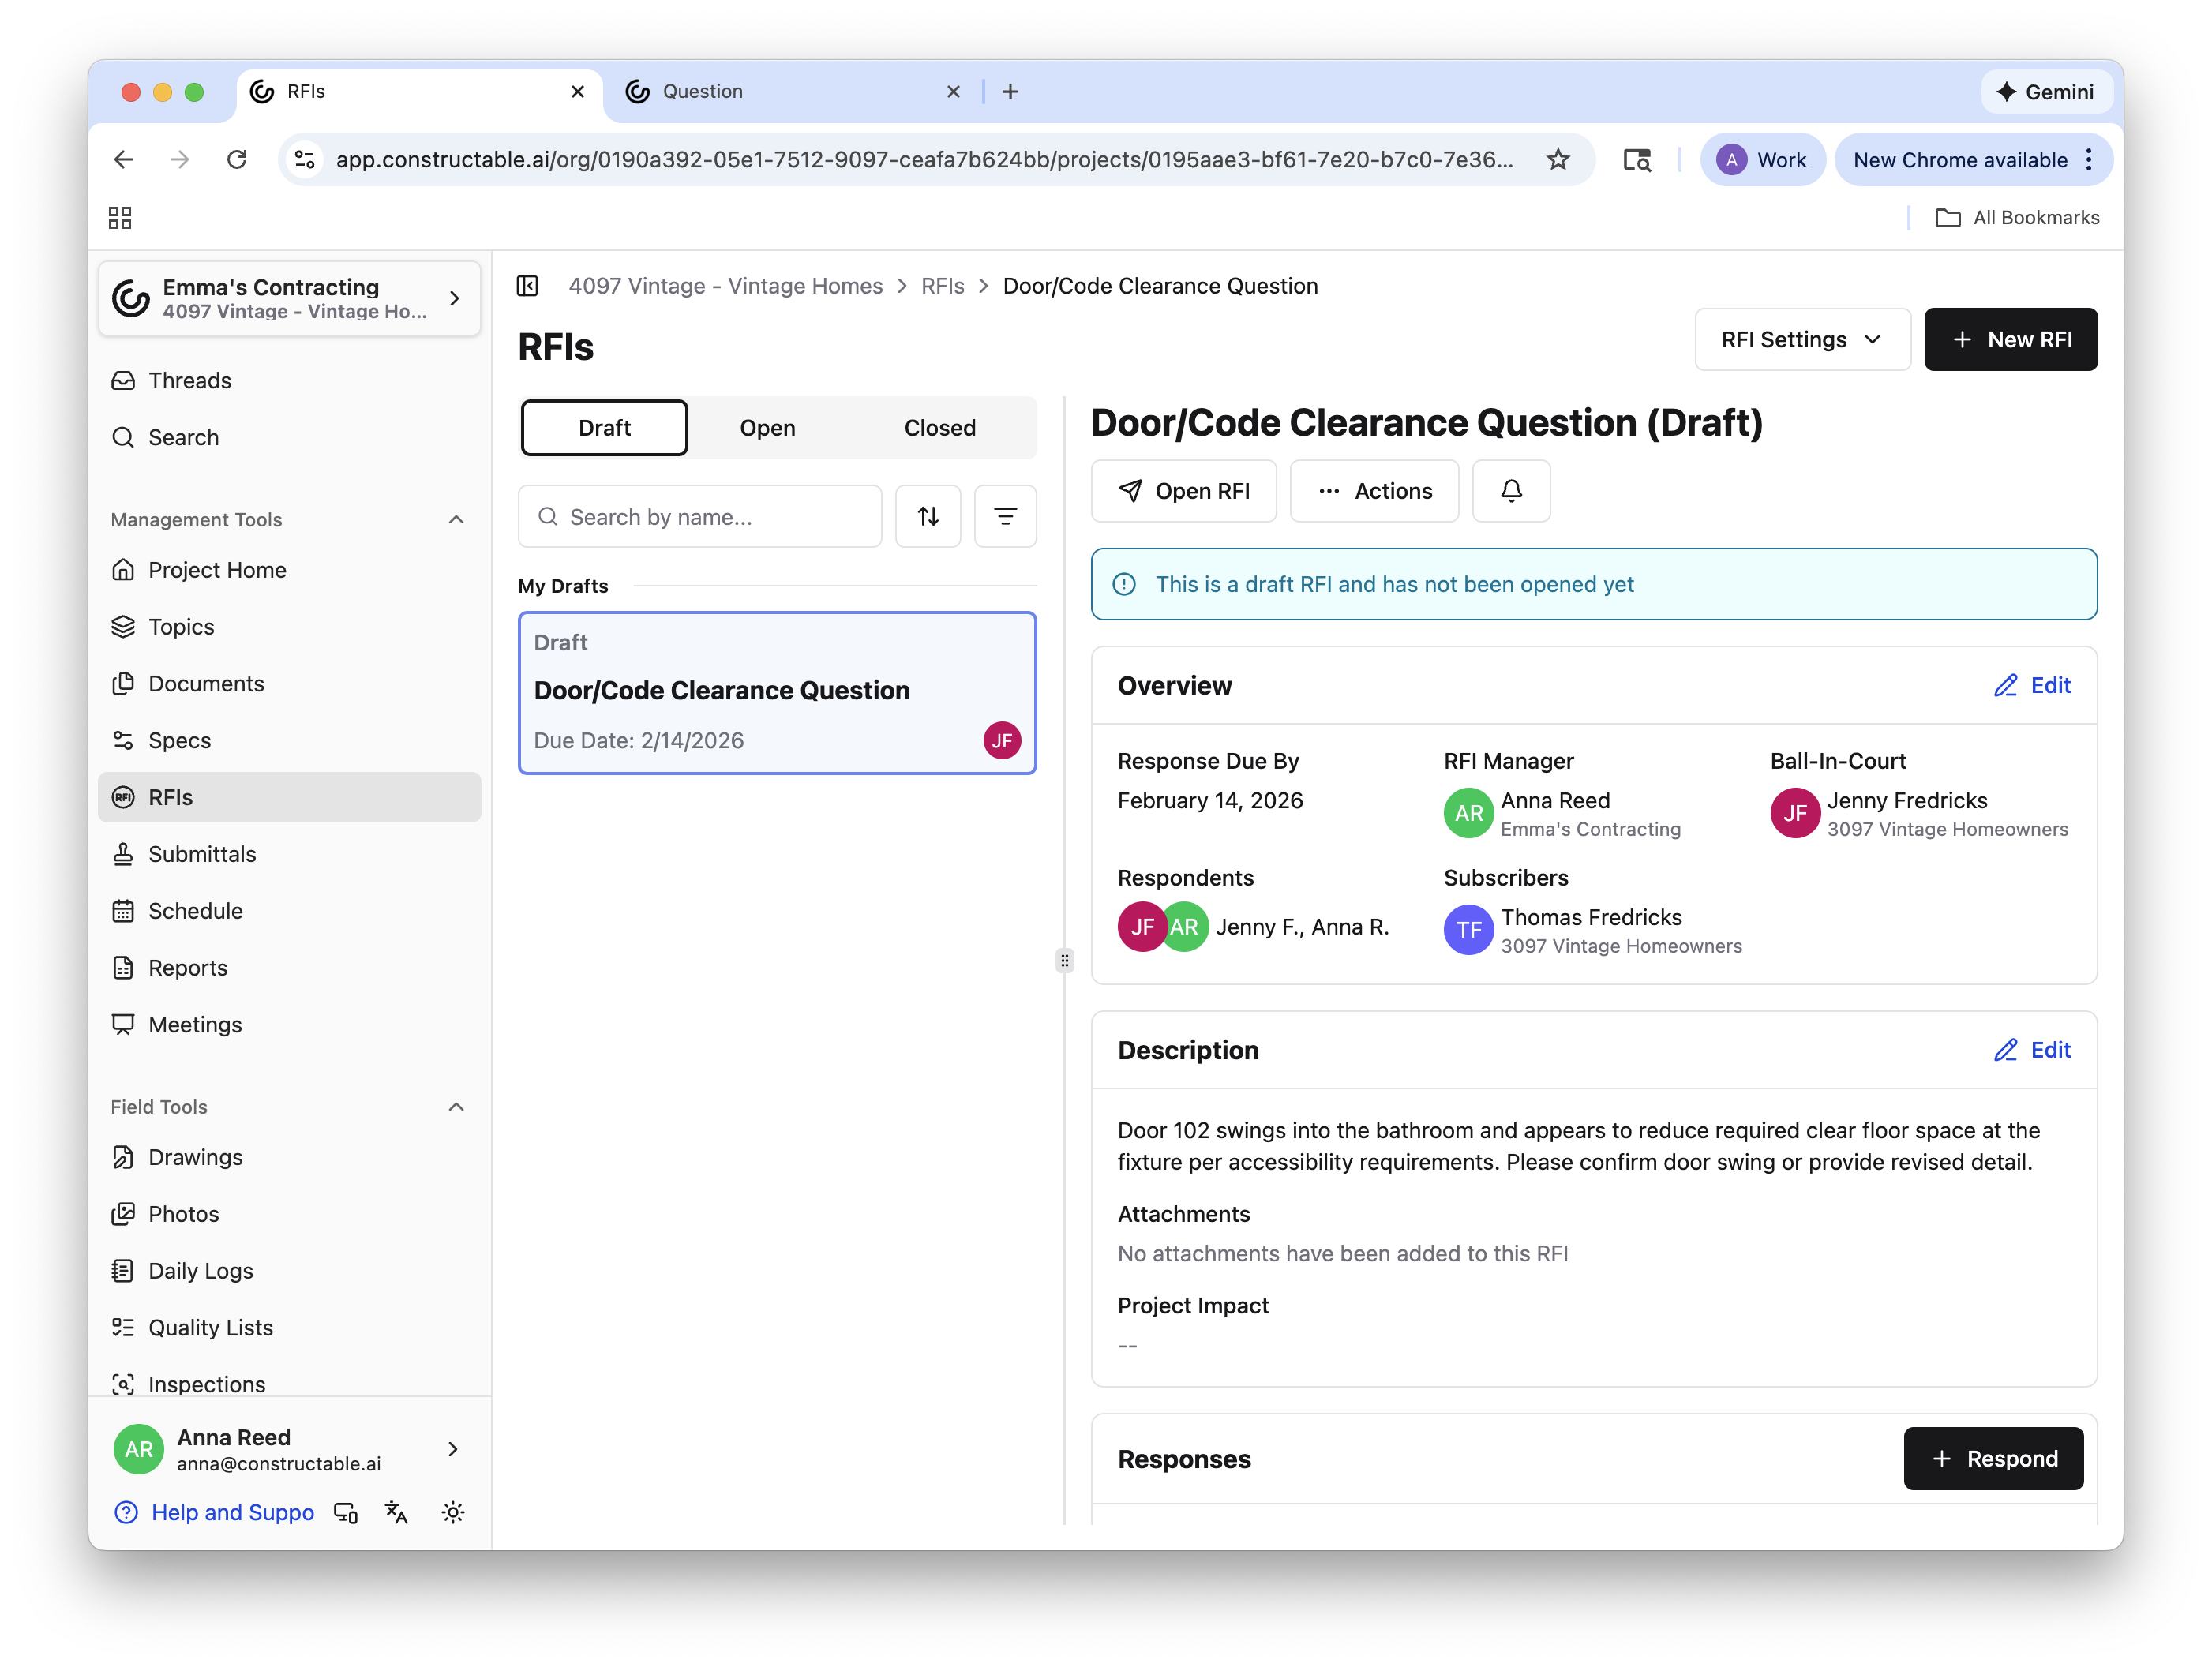
In the Overview section, you can see or edit information related to the following fields:
Response Due By: Select the date you need a response by
RFI Manager: This will default to the creator of the RFI, but can be changed
Ball-In-Court: Who is responsible for the task at hand
Respondents: Assign those responsible for completing the RFI
Subscribers: Other members on the project who may need access to the RFI
The Description section lets you give your team a detailed look at the request. Add attachments or assign the project impact here to give them the most information possible.
The Responses section keeps pertinent responses separate from general comments.
The Sheet Markups section will track all sheets tagged with markups saved to this RFI. Export to PDF if you would like to download a PDF copy of all markups relevant to the RFI across sheets—formatted with one sheet per page.
Comments compiles all comments made on sheets saved to the RFI, keeping them separate from the responses, but still accessible from the main workflow.
Note: Notifications will be sent to all relevant persons, but only after the RFI is opened. While in draft mode, it remains for your eyes only. To read more about notification settings, see: 📄 Notification Preferences
Once you save all the important information, you can open the RFI by selecting the Open RFI button.
All open RFIs are organized with your ball-in-court assignments at the top, so the most pressing and relevant tasks stay at the top of your mind.
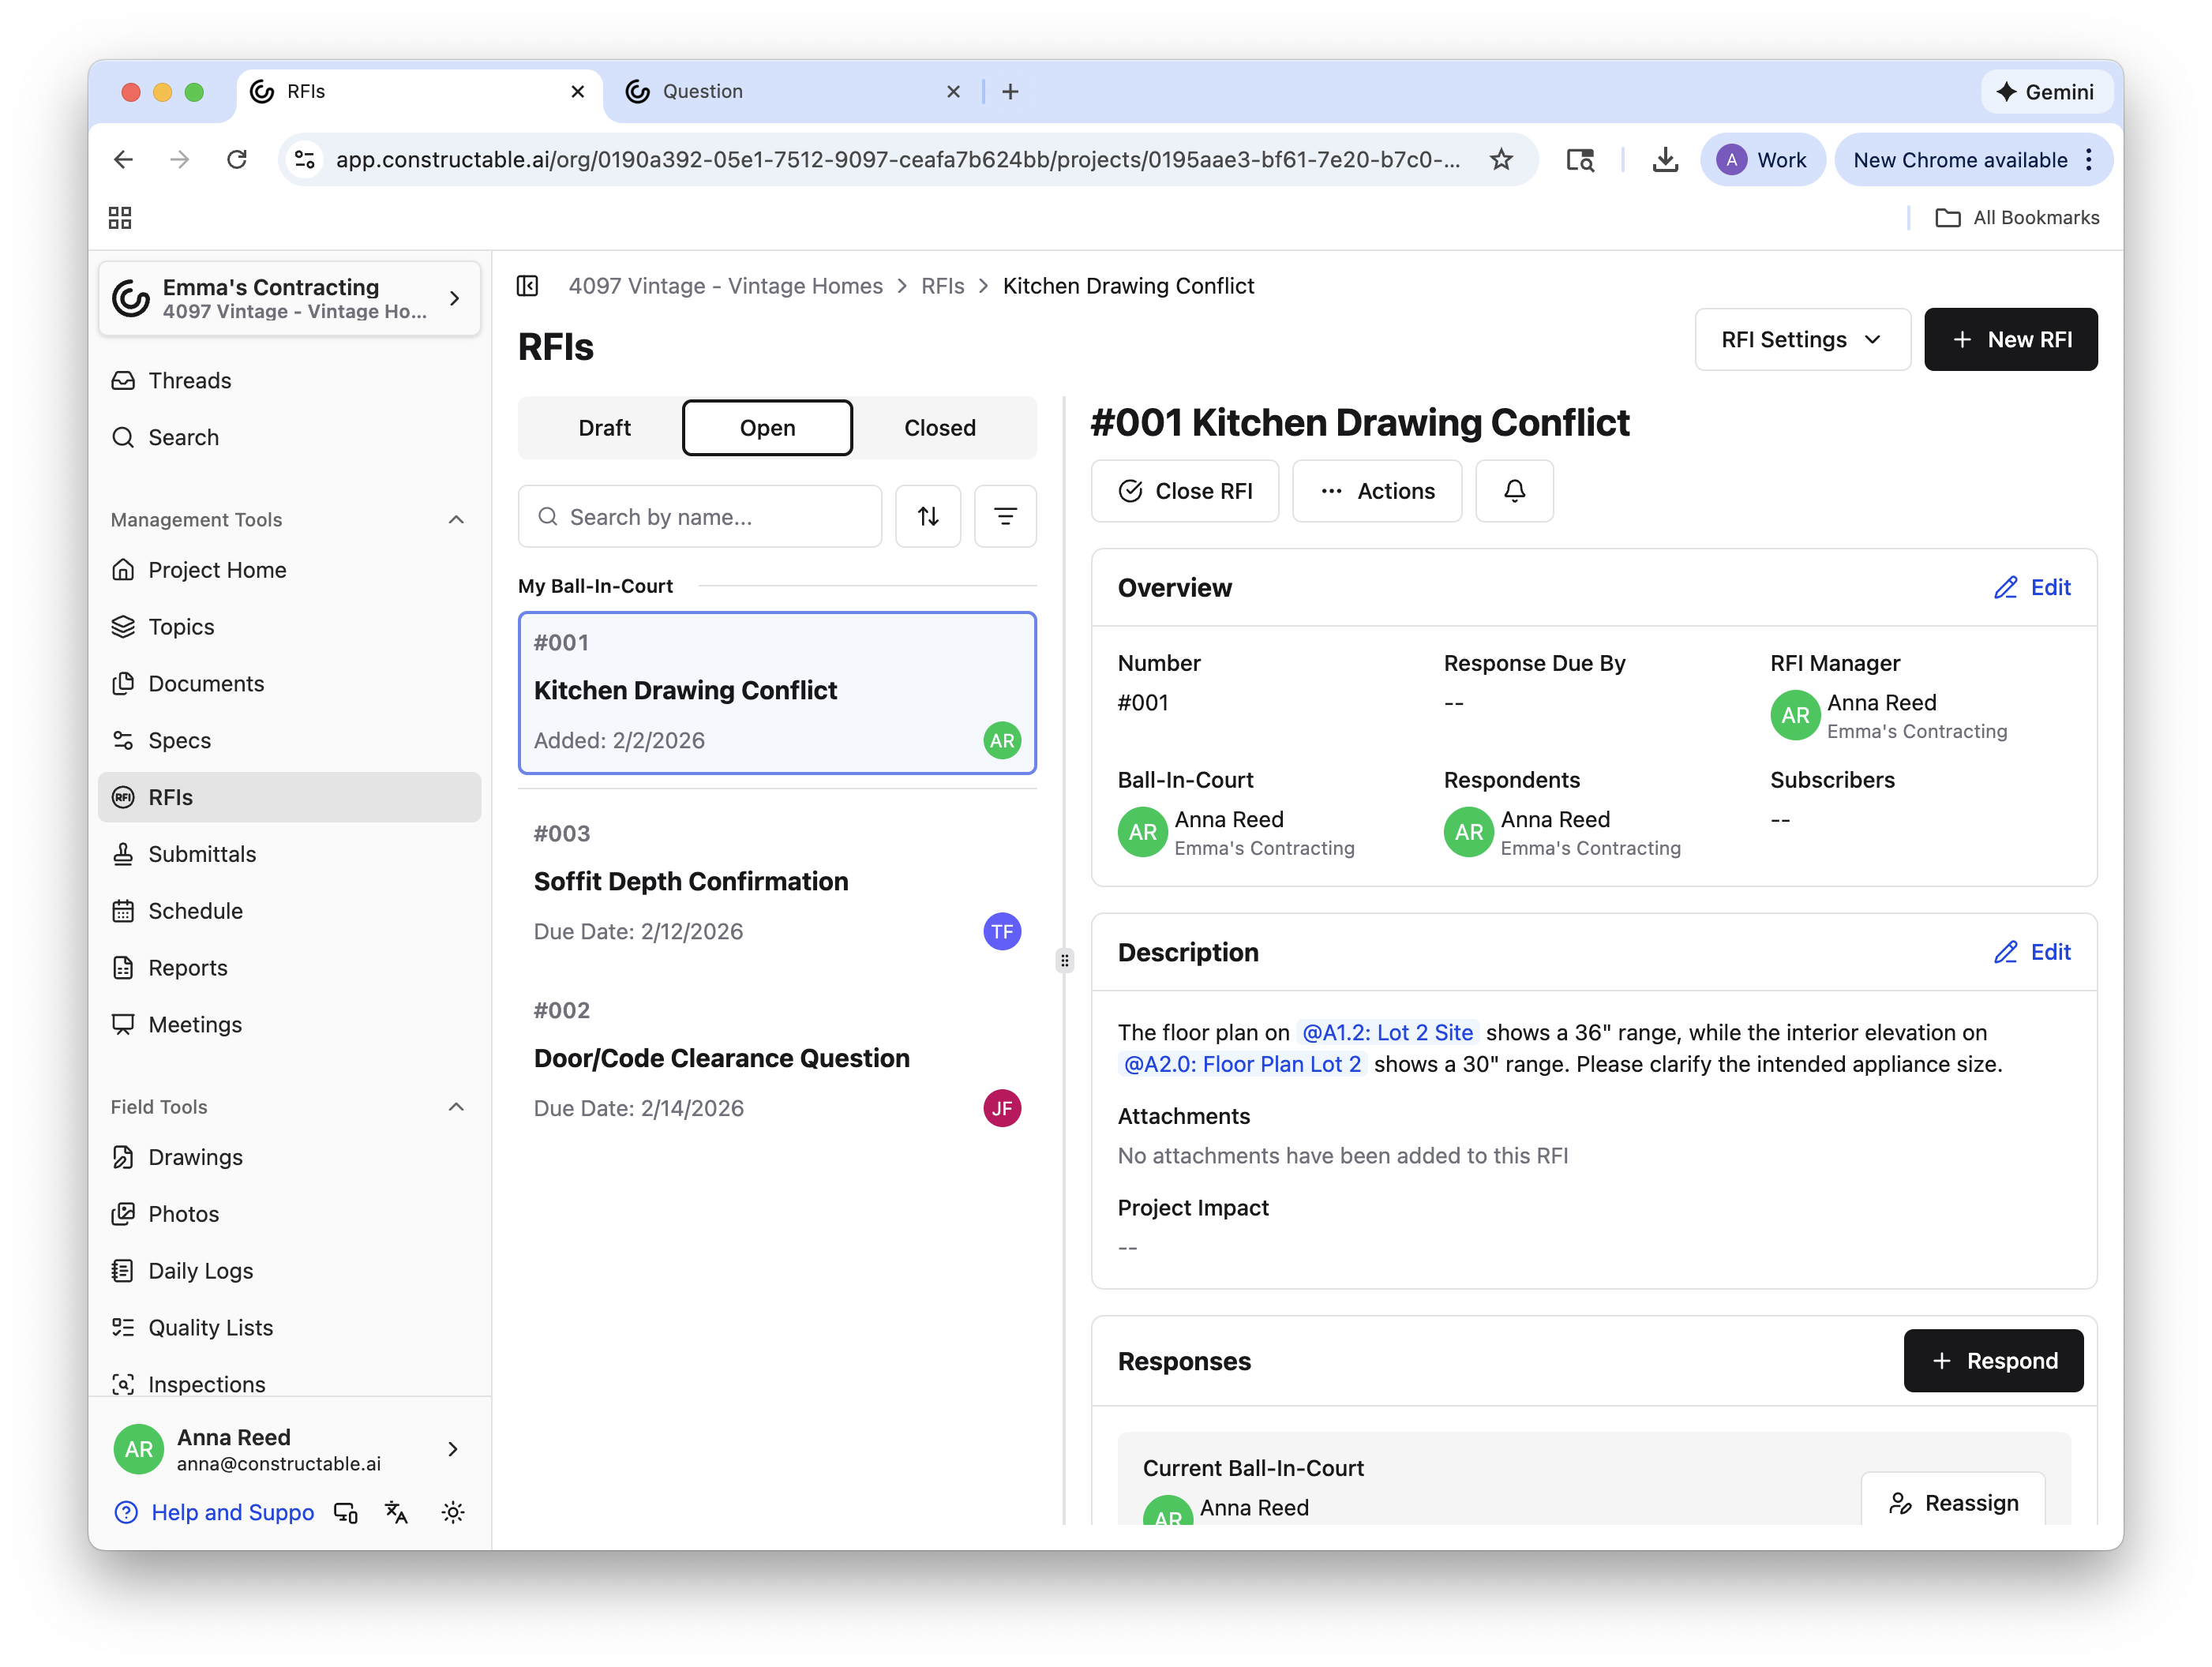
From this page, you can also Rename RFI, Send Reminder Notification, Copy Link, Download PDF, and Delete RFI from the Actions drop-down menu.
At the top of the page, click + New RFI, or select RFI Settings > Set Default Subscriber List or Open RFI Report.
Note: After an RFI is opened, you can manually reassign who the current ball-in-court is by selecting Reassign under the Responses section.
Click + Respond to add a response to the RFI. Include as much detail as you'd like in the response—feel free to add attachments—and click Respond. Once a response is recorded, you can choose to Accept and Close RFI or select the drop-down and click Accept Without Closing RFI.
If you choose to close the RFI, you can do so by selecting Close RFI at the top, next to the Actions button, or you can Accept and Close RFI under the Responses section. For both options, a pop-up menu will appear, allowing you to close and distribute the RFI to subscribers. Choose who you'd like to send the distribution message to, and you can also use our AI to autofill the message.
Note: Autofill helps get you started faster by generating a suggested draft. As with any draft, take a moment to review before sending to make sure it reflects your intent!
Table View vs. Panel View
The above photos and videos were all in Panel View. To switch to Table View, select the RFIs Menu dropdown menu and then Switch to Table View.
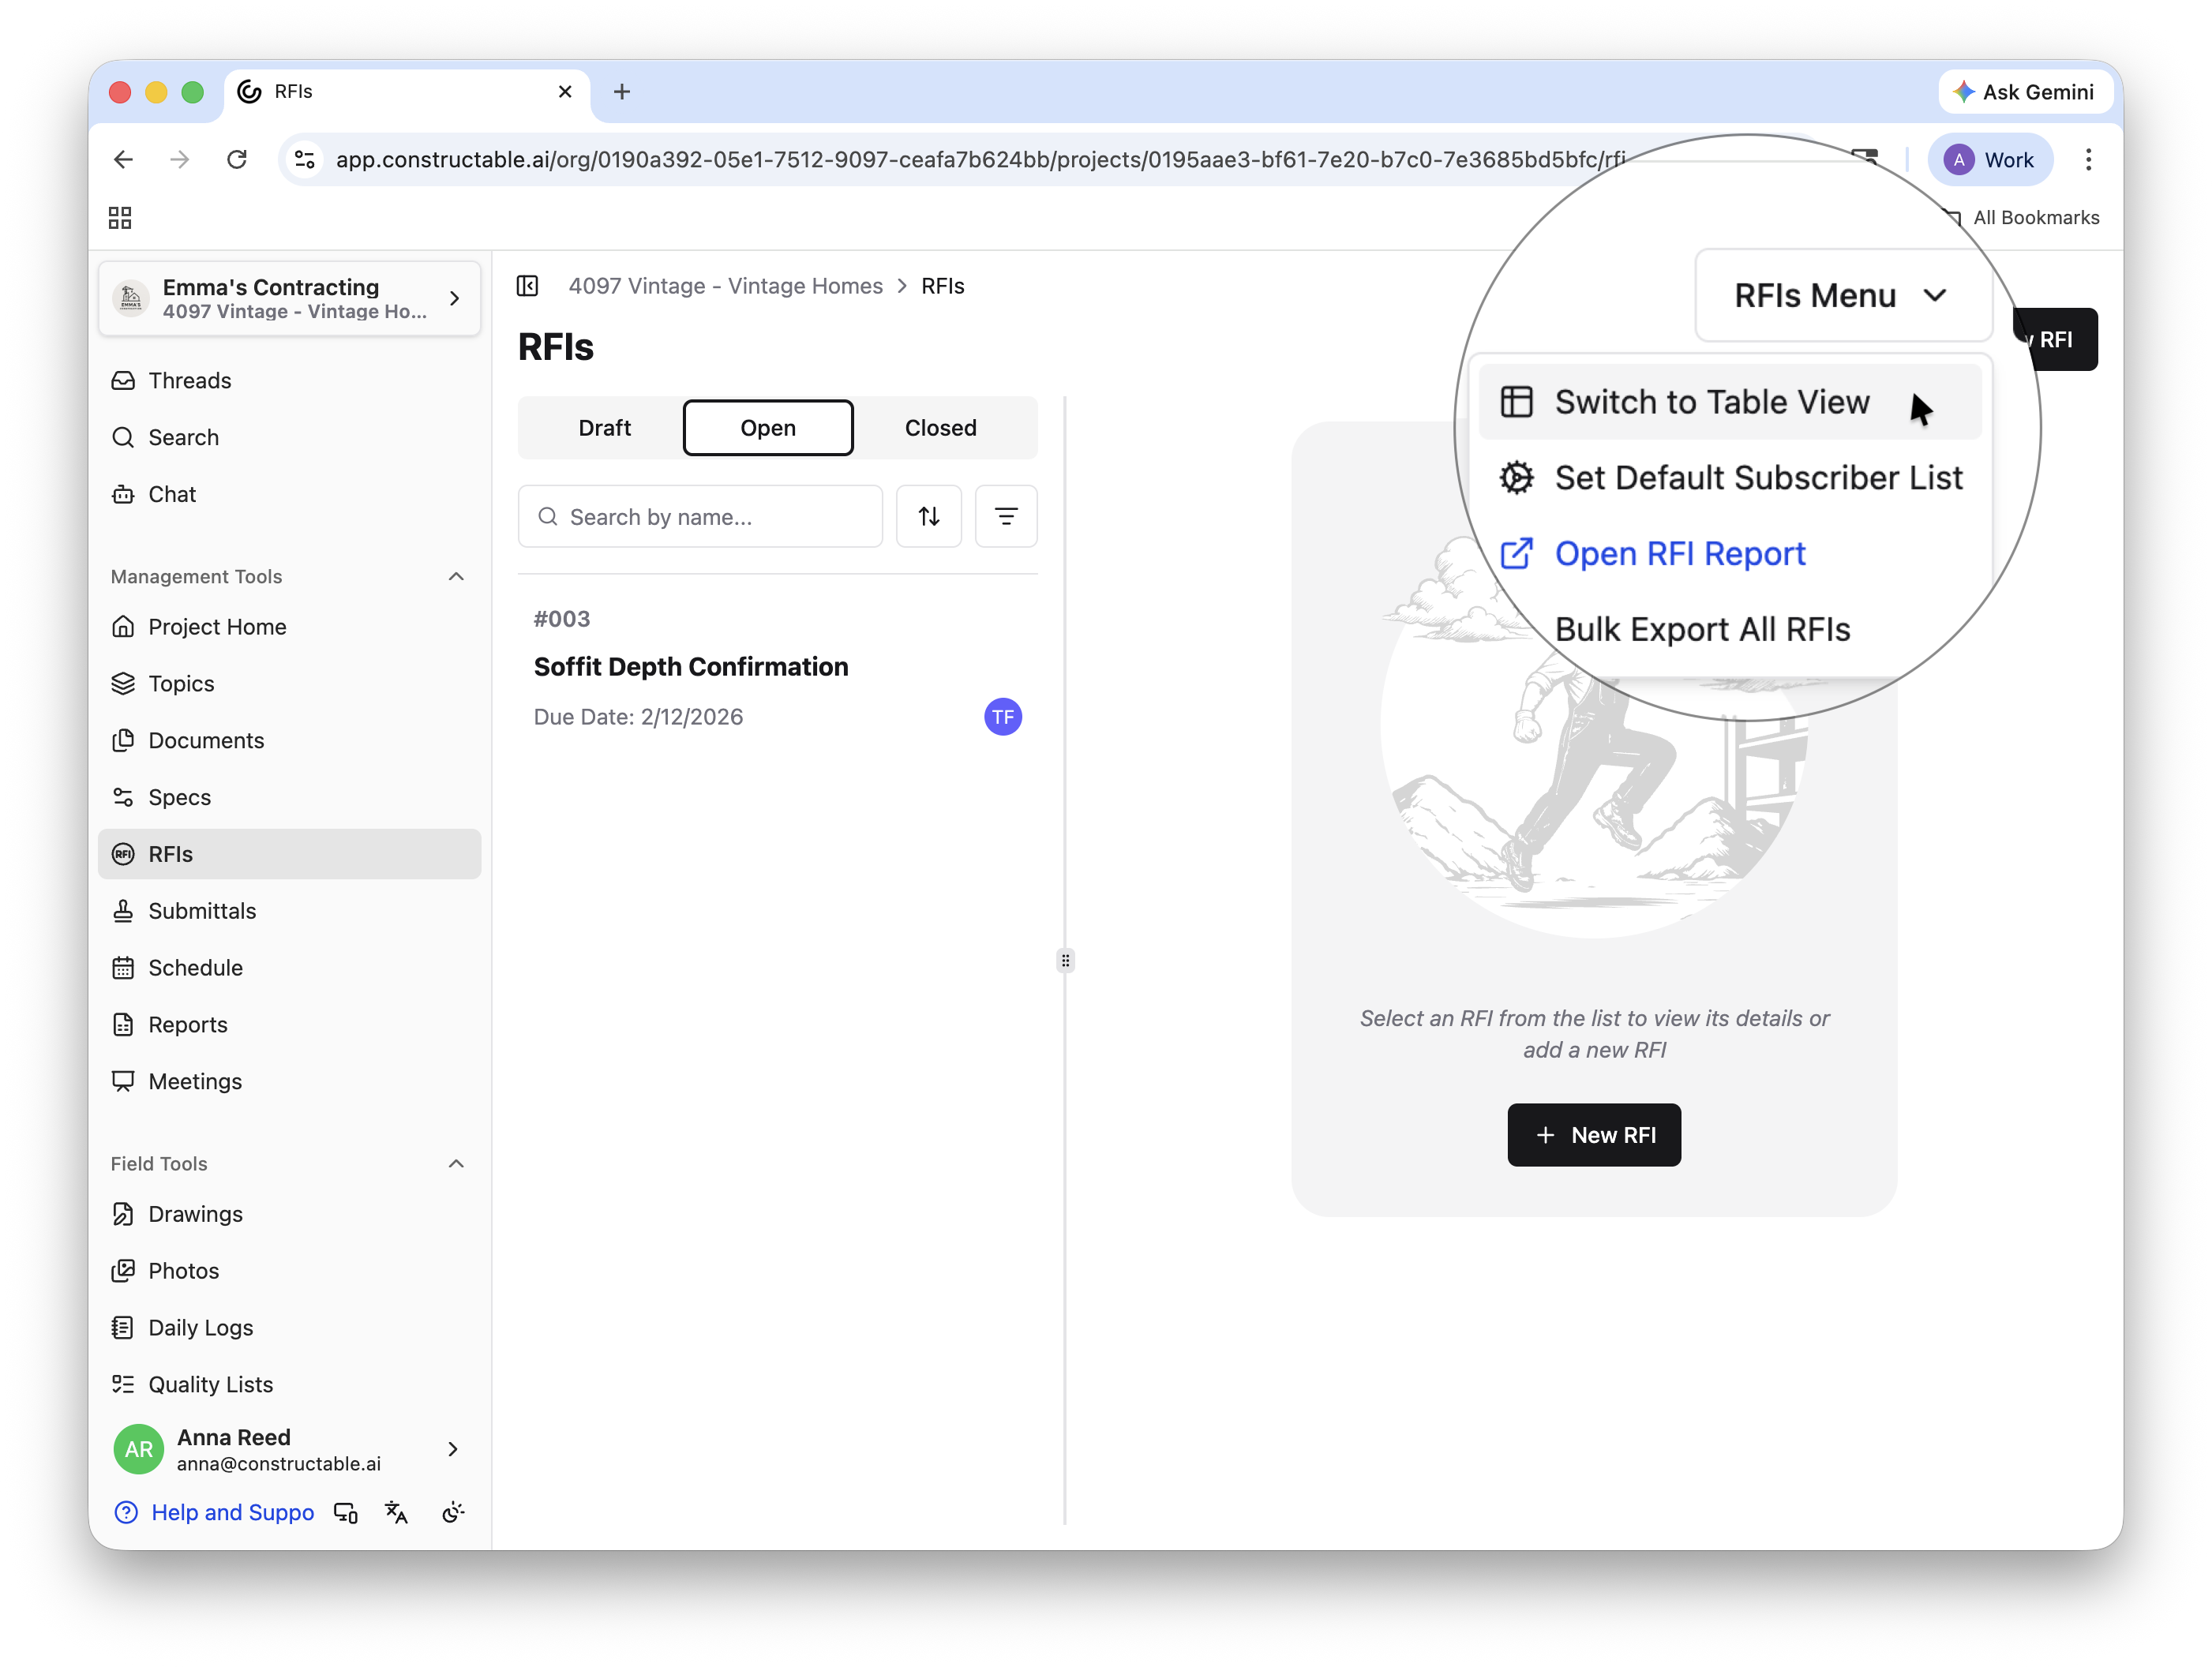
Table View allows you to see all RFIs (drafted, opened, or closed) in one big list. You can select the information displayed, filter, and group all RFIs in a number of different ways.
Note: Whichever view you exit the RFIs workflow in will be the default view the next time you open the workflow. No need to keep switching to your preferred view!
Drawing Viewer
Creating and Adding RFIs to Drawings
There are a few different ways to create new RFIs and add existing ones to drawing sheets. The first way is to place an RFI pin somewhere on the desired sheet. To do this, select the RFI pin from the sidebar, then click—or click and drag to indicate an area—where you'd like to place the RFI. From there, you can click Create new RFI here... or Pin existing RFI here... If you choose to create a new RFI, the steps from the RFIs workflow above apply. If you choose to pin an existing RFI, select it or search for it, then click Pin RFI.
Another way to do this is to click Menu > RFIs > + Create New RFI, or select an existing RFI (drafts, open, or closed) from the list to open it.
Note: Just because you have an RFI open in the drawing viewer doesn't necessarily mean the sheet will be tagged. To ensure the sheet you want is connected to the RFI, add a pin.
Managing RFIs in Drawing Viewer
Once you have pinned an RFI to a sheet, any markups you make with that RFI open will automatically save. You can see which RFI, if any, you have open in the upper-right corner of the drawing viewer. There you will find the RFI icon and the blue hyperlink “RFI: RFI Name.” To see the full details for the RFI, you can either select that blue hyperlink at the top or select the RFI pin and click View Full RFI.
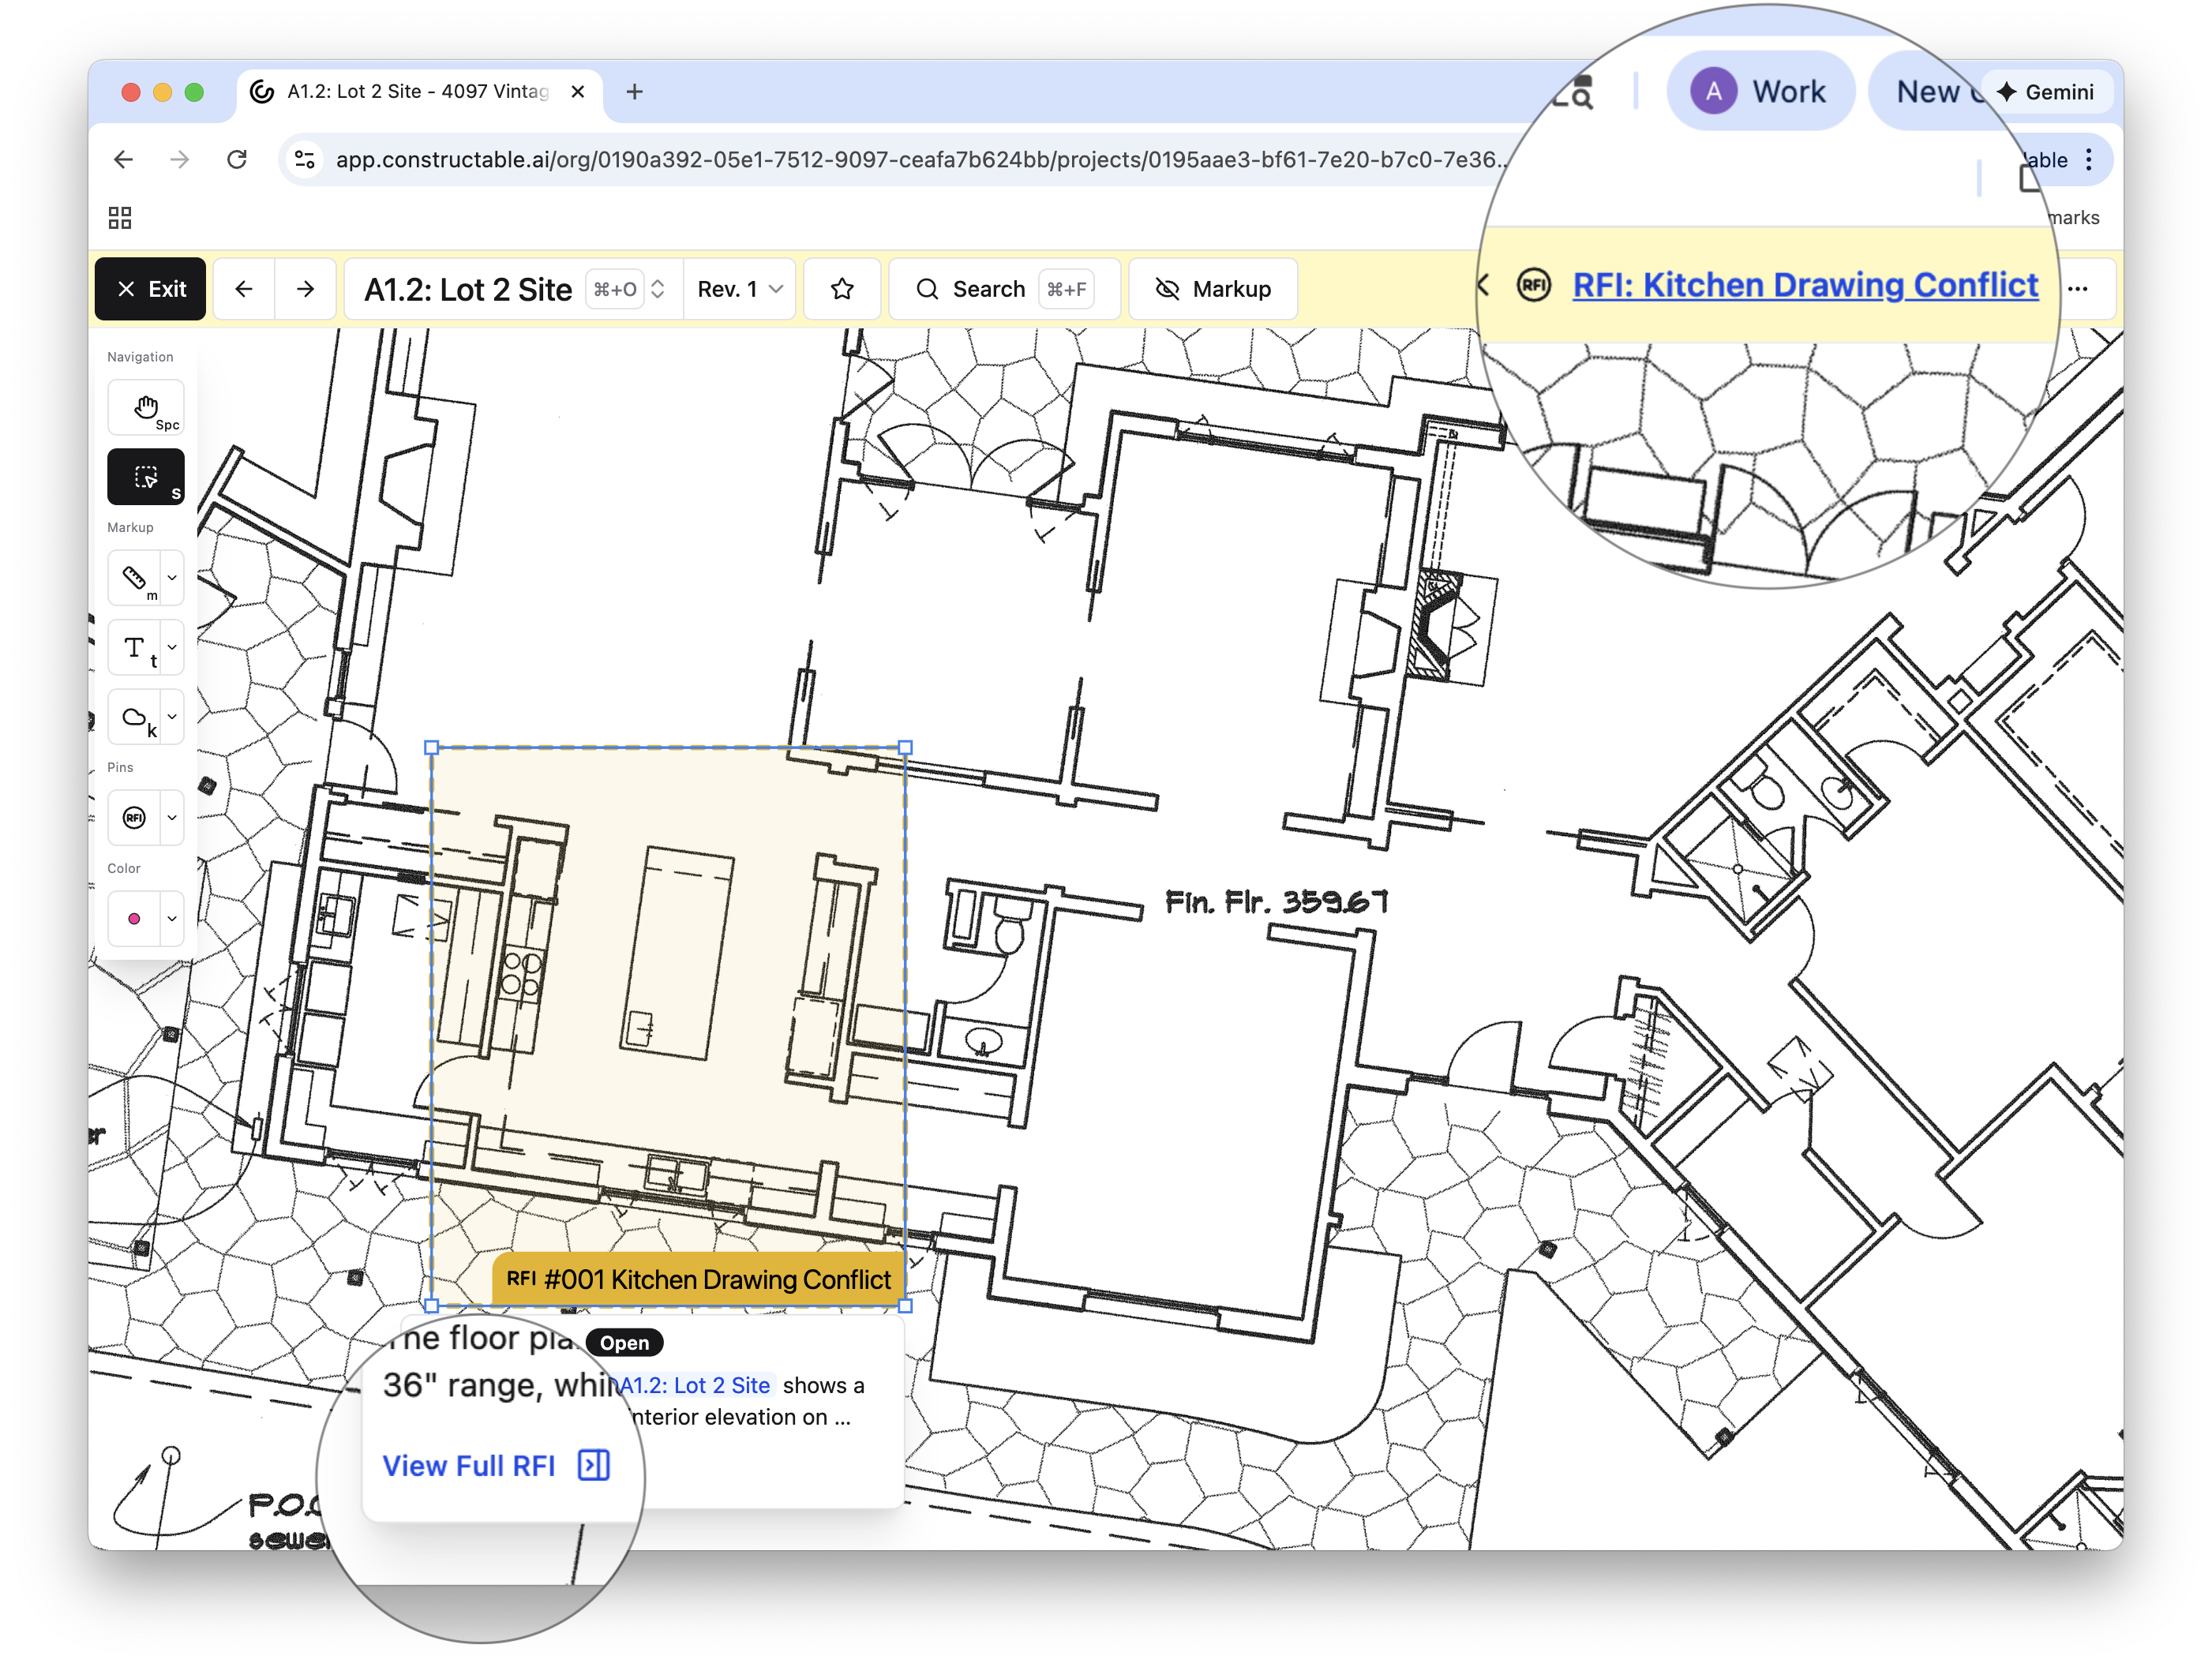
Add text, shapes, measurements, and other markups to an RFI to clarify the situation. Use comments to communicate with team members directly on the sheet.
Note: You cannot edit markups saved to an RFI unless that RFI is open.
And just like that, your RFIs are no longer scattered—they’re organized, documented, and tied exactly where they belong.
Frequently Asked Questions
What's the difference between Responses and Comments?
Responses are the official answers to the RFI and are used to move the RFI toward resolution. Comments are for discussion, clarification, or internal conversation and do not count as a formal response.
Who is responsible for an RFI at any given time, and how can I tell?
The Ball-In-Court field shows who is currently responsible for taking action—whether that’s responding, reviewing, or closing the RFI. This can be updated manually after the RFI is opened if responsibility changes.
Who can create or respond to RFIs?
Any project team member added to the project could view RFIs by default. Users can be assigned as RFI managers, respondents, or subscribers depending on their role, and responsibility is tracked using the Ball-In-Court field.