Uploading Drawing Sets
Last updated: January 5, 2026
Overview
The Drawings feature provides a centralized location for all things project plans. While the Drawings workflow has many functions, this article is focused on the first—and arguably the most important—step: uploading. This page will walk you through the process of Importing, Processing, Reviewing, and Publishing plans so they are accessible to the entire project team. By following these steps, teams can ensure the most up-to-date drawings are organized, reviewed, and shared across the project.
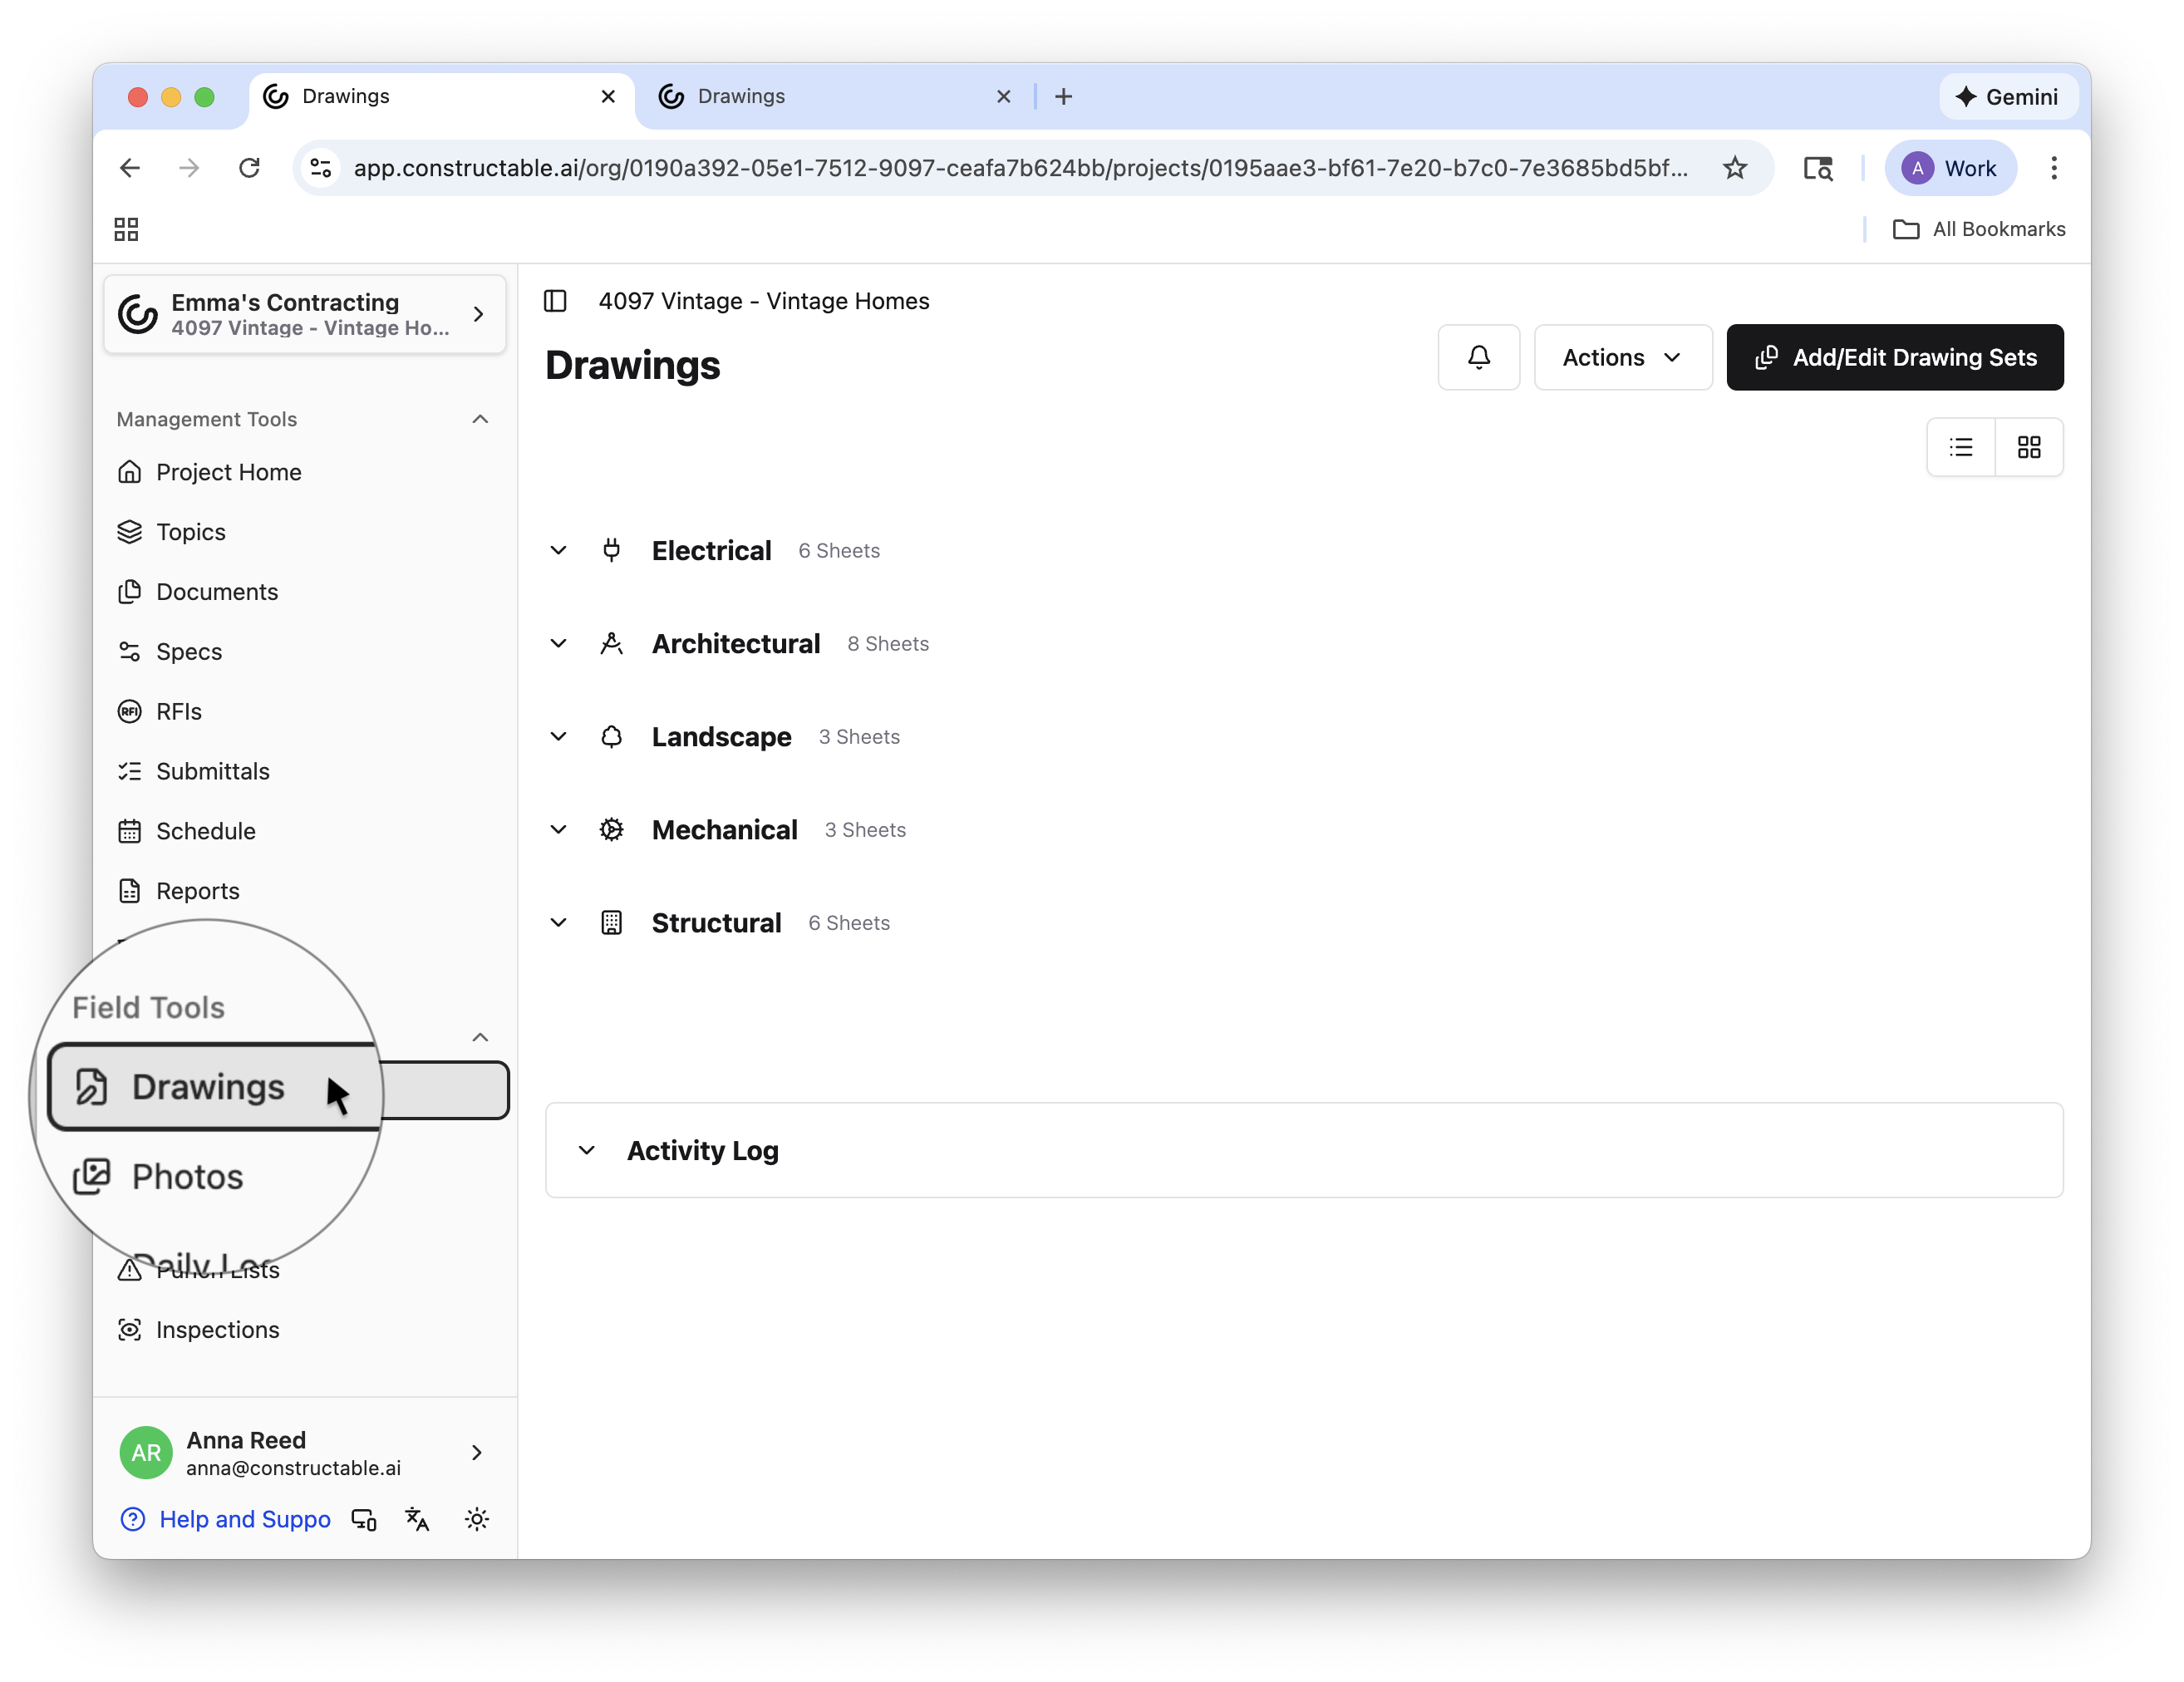
Importing
To upload a new drawing set or edit a pre-existing drawing set, select Add/Edit Drawing Sets in the upper right hand corner. To edit an existing set, select the set of interest and make your edits. To add a new set, click + Add New Drawing Set. Title your drawing set, add the date, a description (though this is not mandatory), and choose or drag and drop your files. You can add a single file, or many files at once. Depending on your connectivity, it may take a minute for your Drawings to fully upload, so don’t worry if they don’t automatically appear. Once they are successfully uploaded, you will be able to Submit.
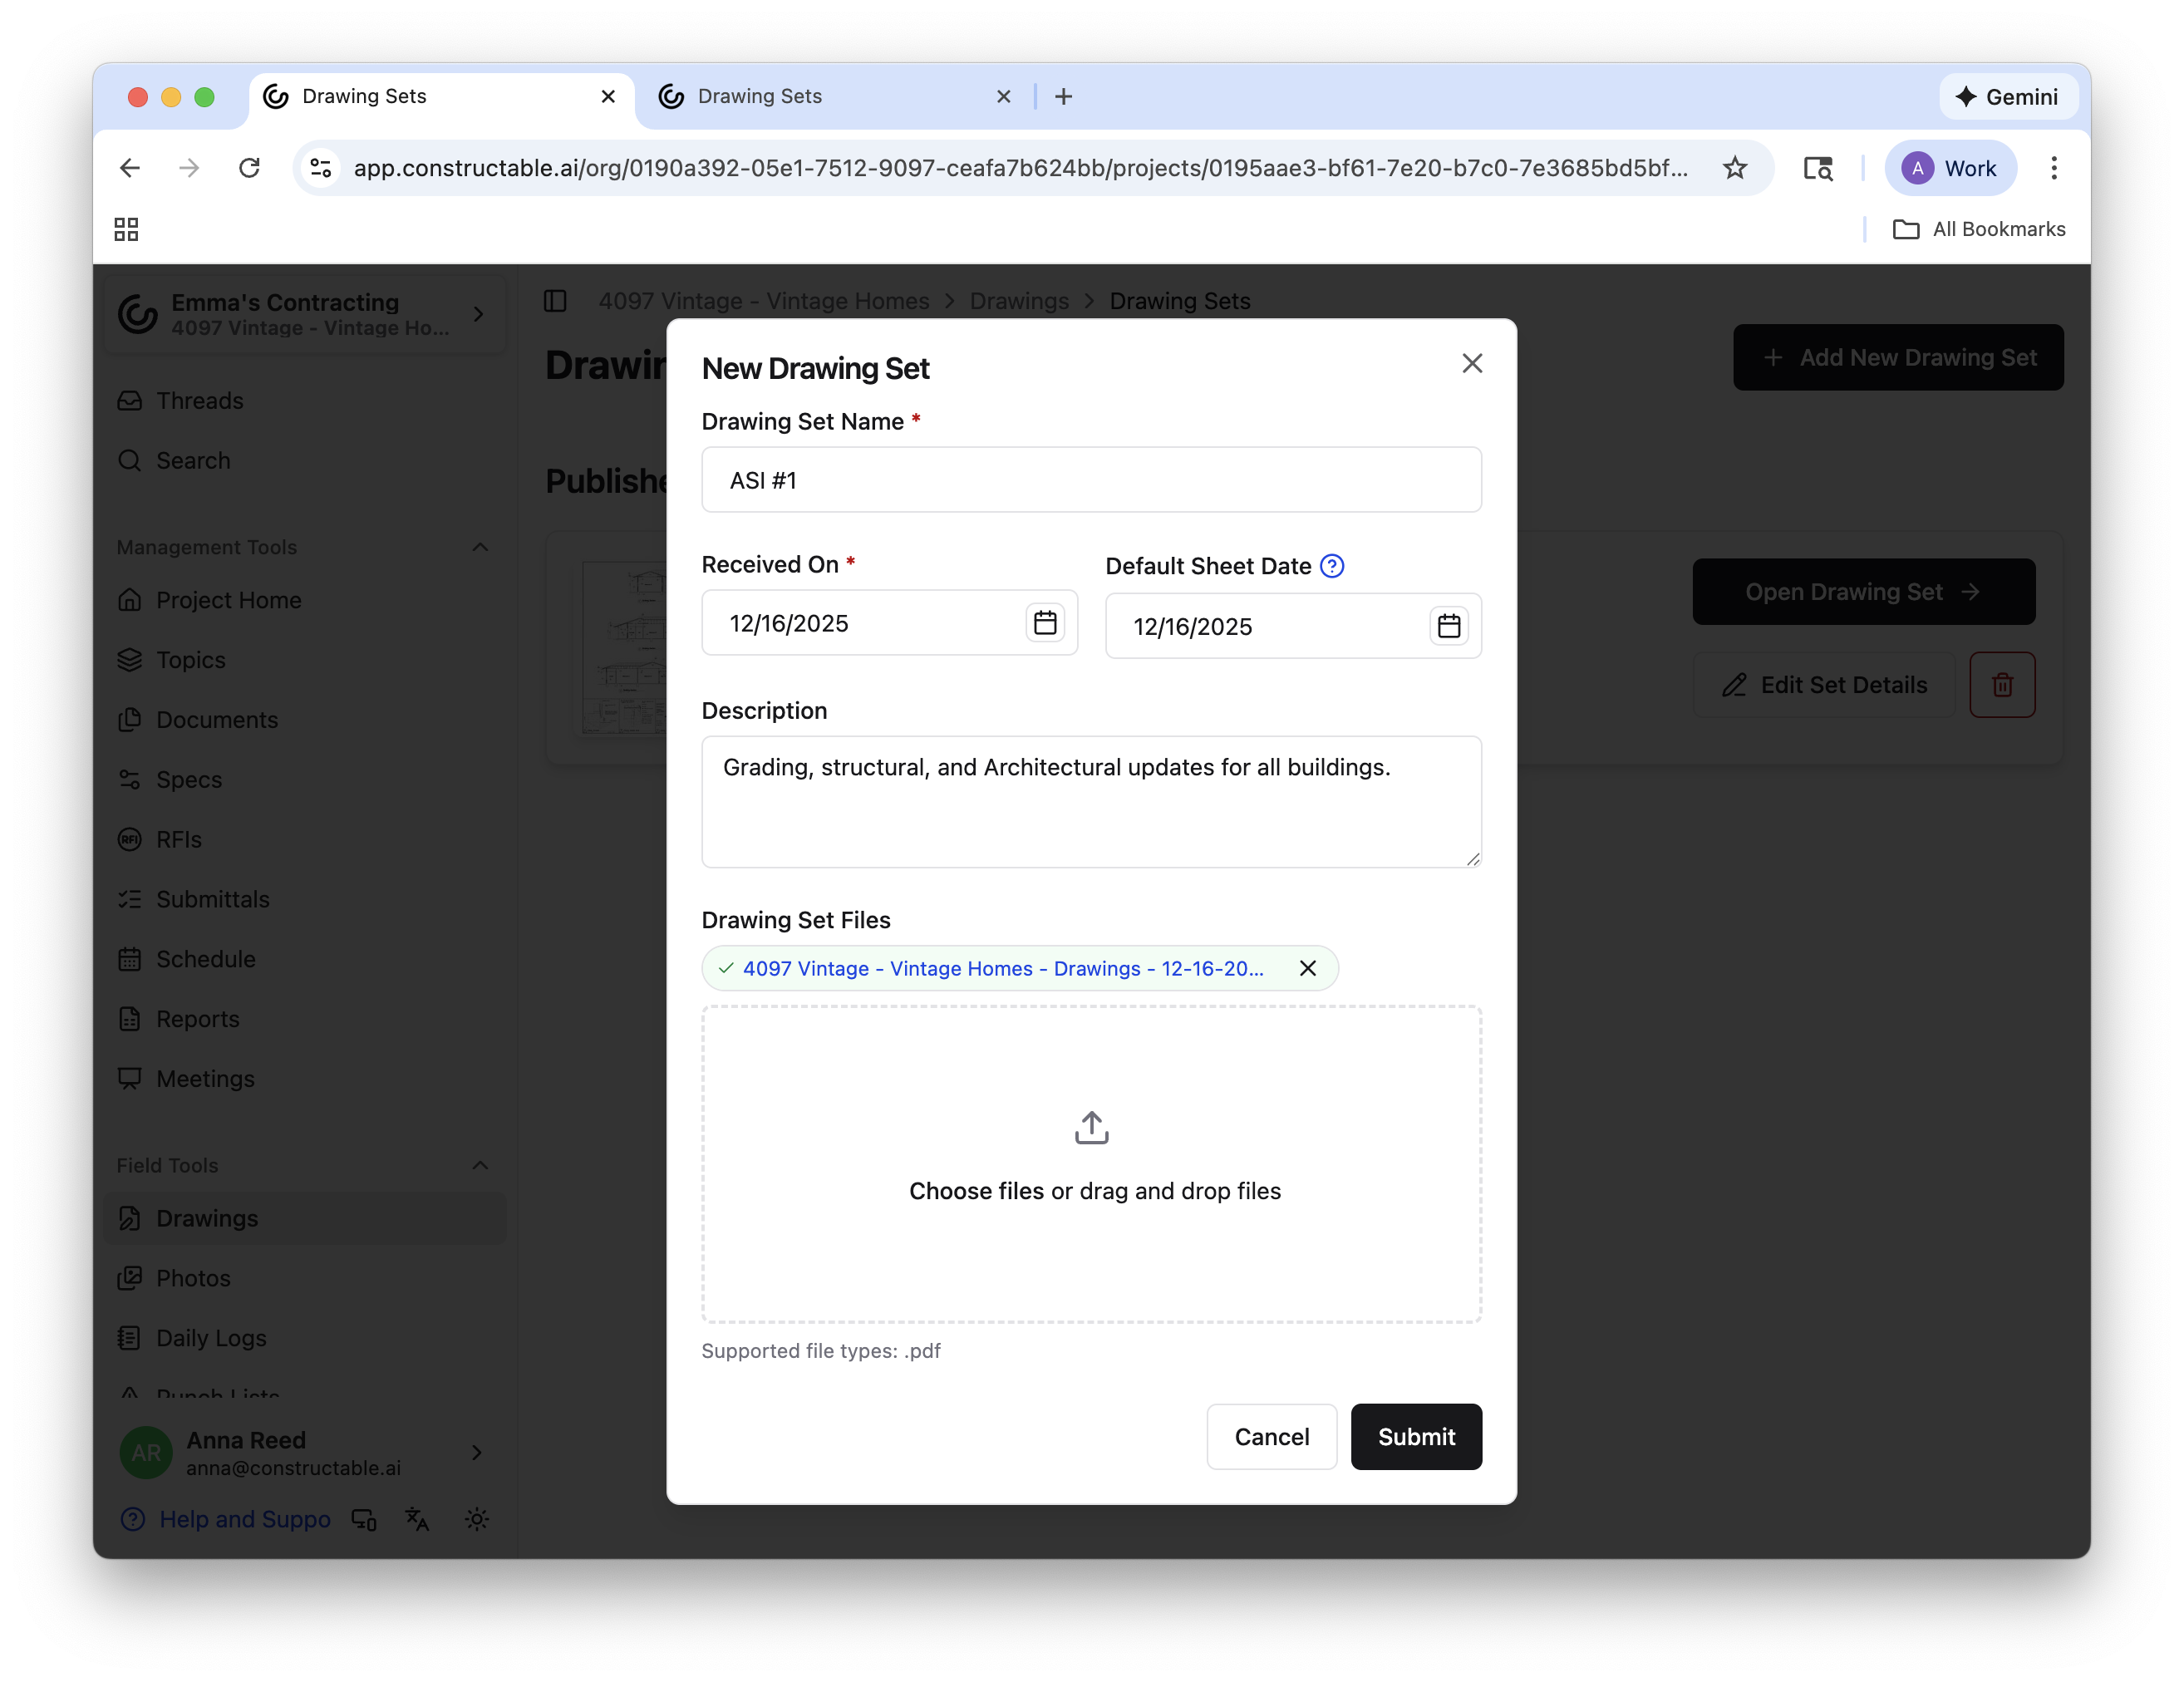
Processing
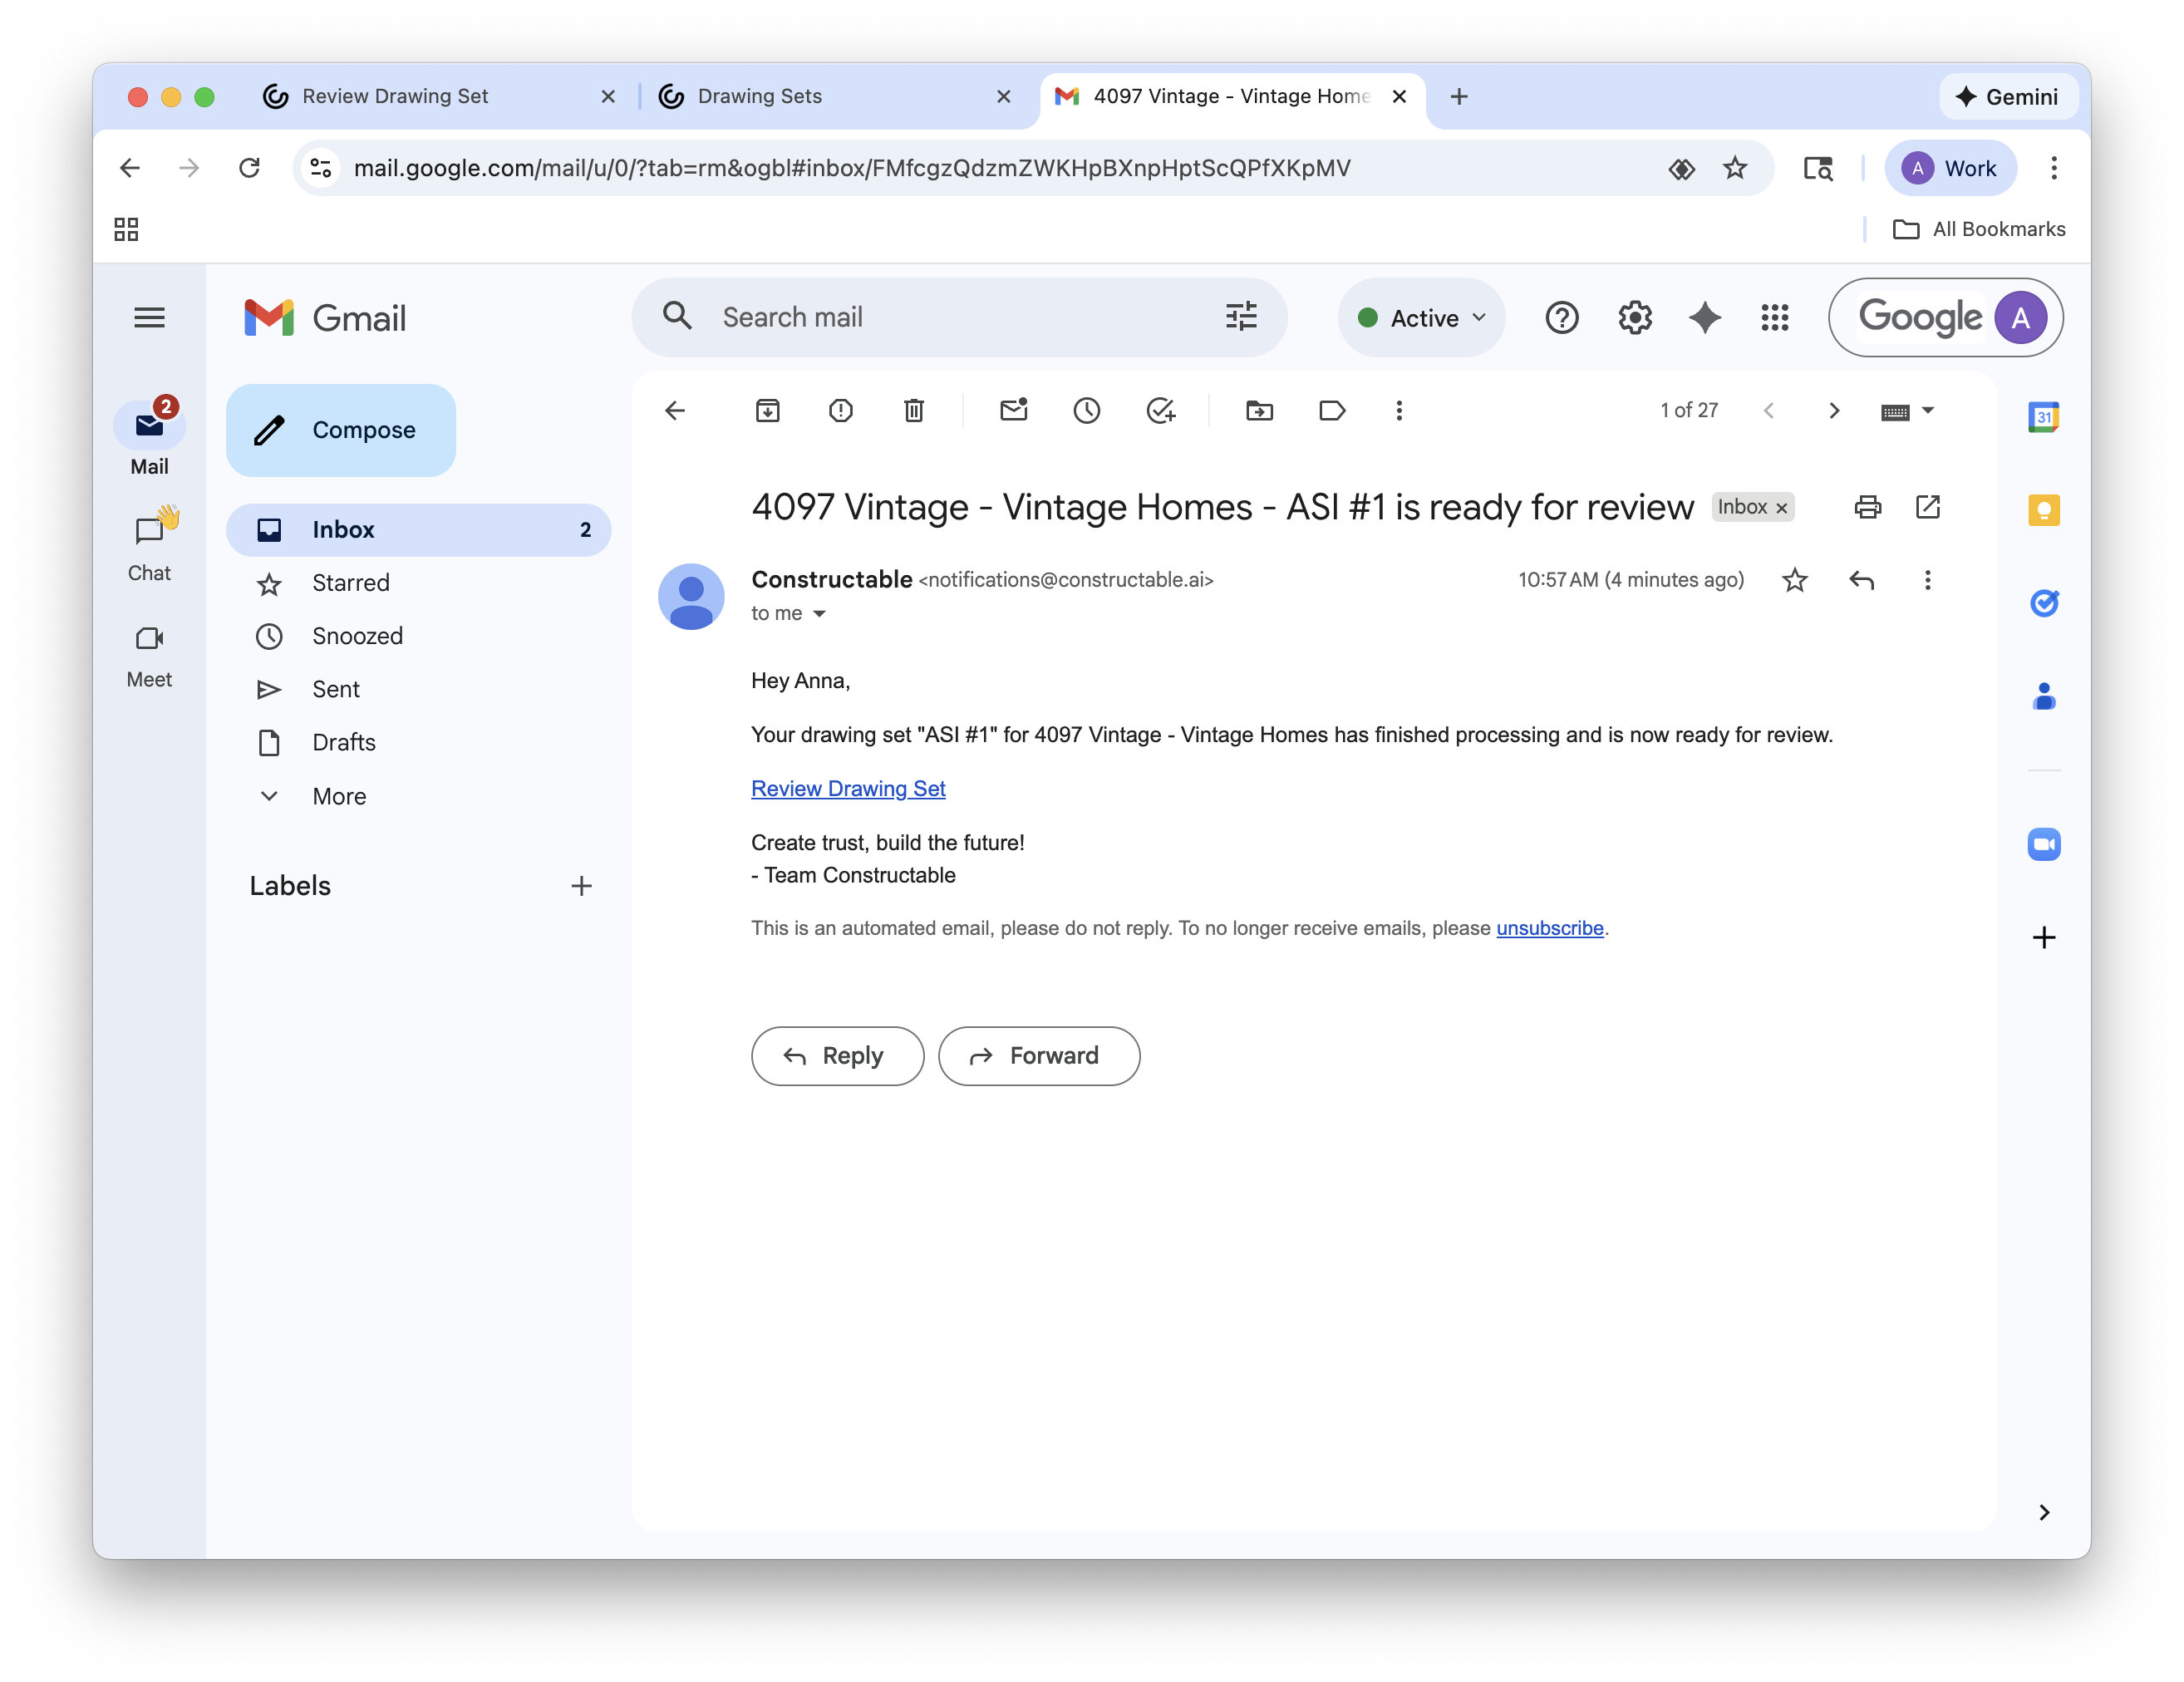
After you hit Submit, our software will begin processing the drawing set. We use AI to scan each sheet individually and pull out key details in order to properly label them. This may take a few minutes, so feel free to navigate away from the page while it's processing—our software will keep processing even if you leave.
Note: You will receive an email when your Drawings are ready for review!
Reviewing
If you do leave the page, you'll get the notification that the drawing set is ready, navigate back to the Drawings home page, and the drawing set doesn’t appear—that’s normal. Before drawing sets appear in the central Drawings page, they need to be reviewed. To complete the review, go back to the Add/Edit Drawing Sets button, and the drawing set will appear at the top under the “Needs Review” banner. If you’d like to change the title or add/edit the description of the drawing set, you can do so here by selecting Edit Set Details. You can also delete the set by selecting the red trash icon.
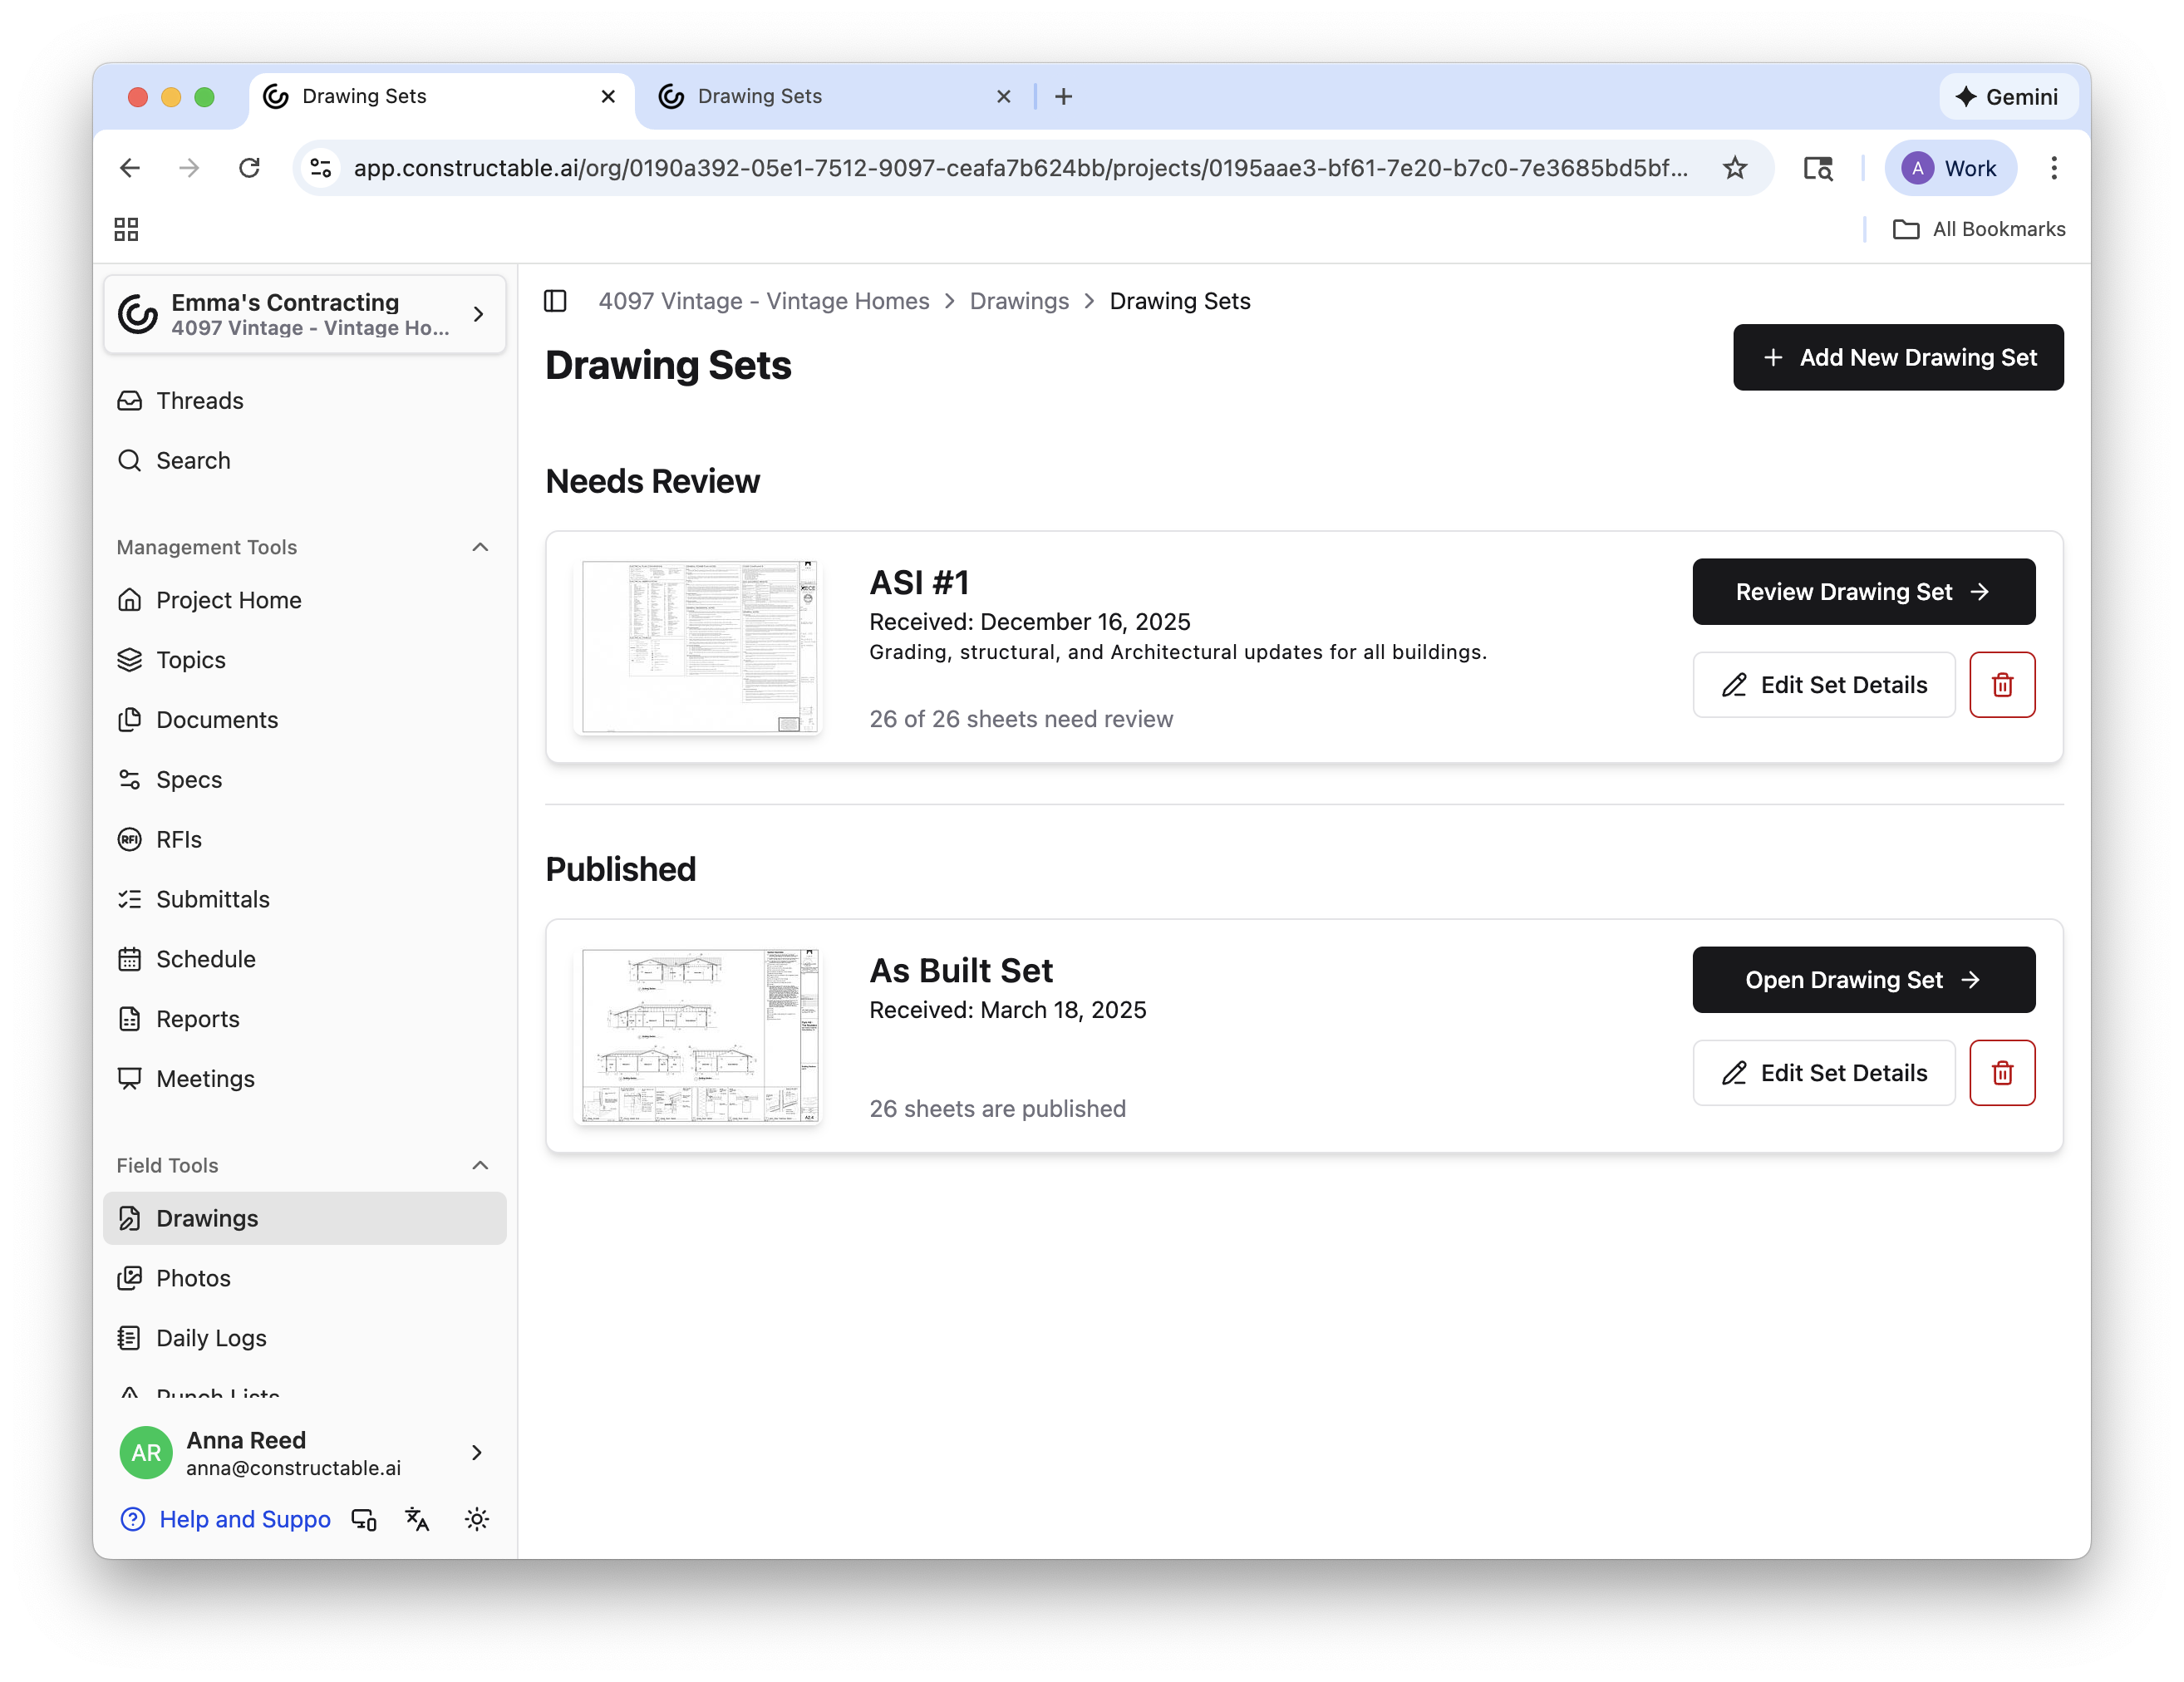
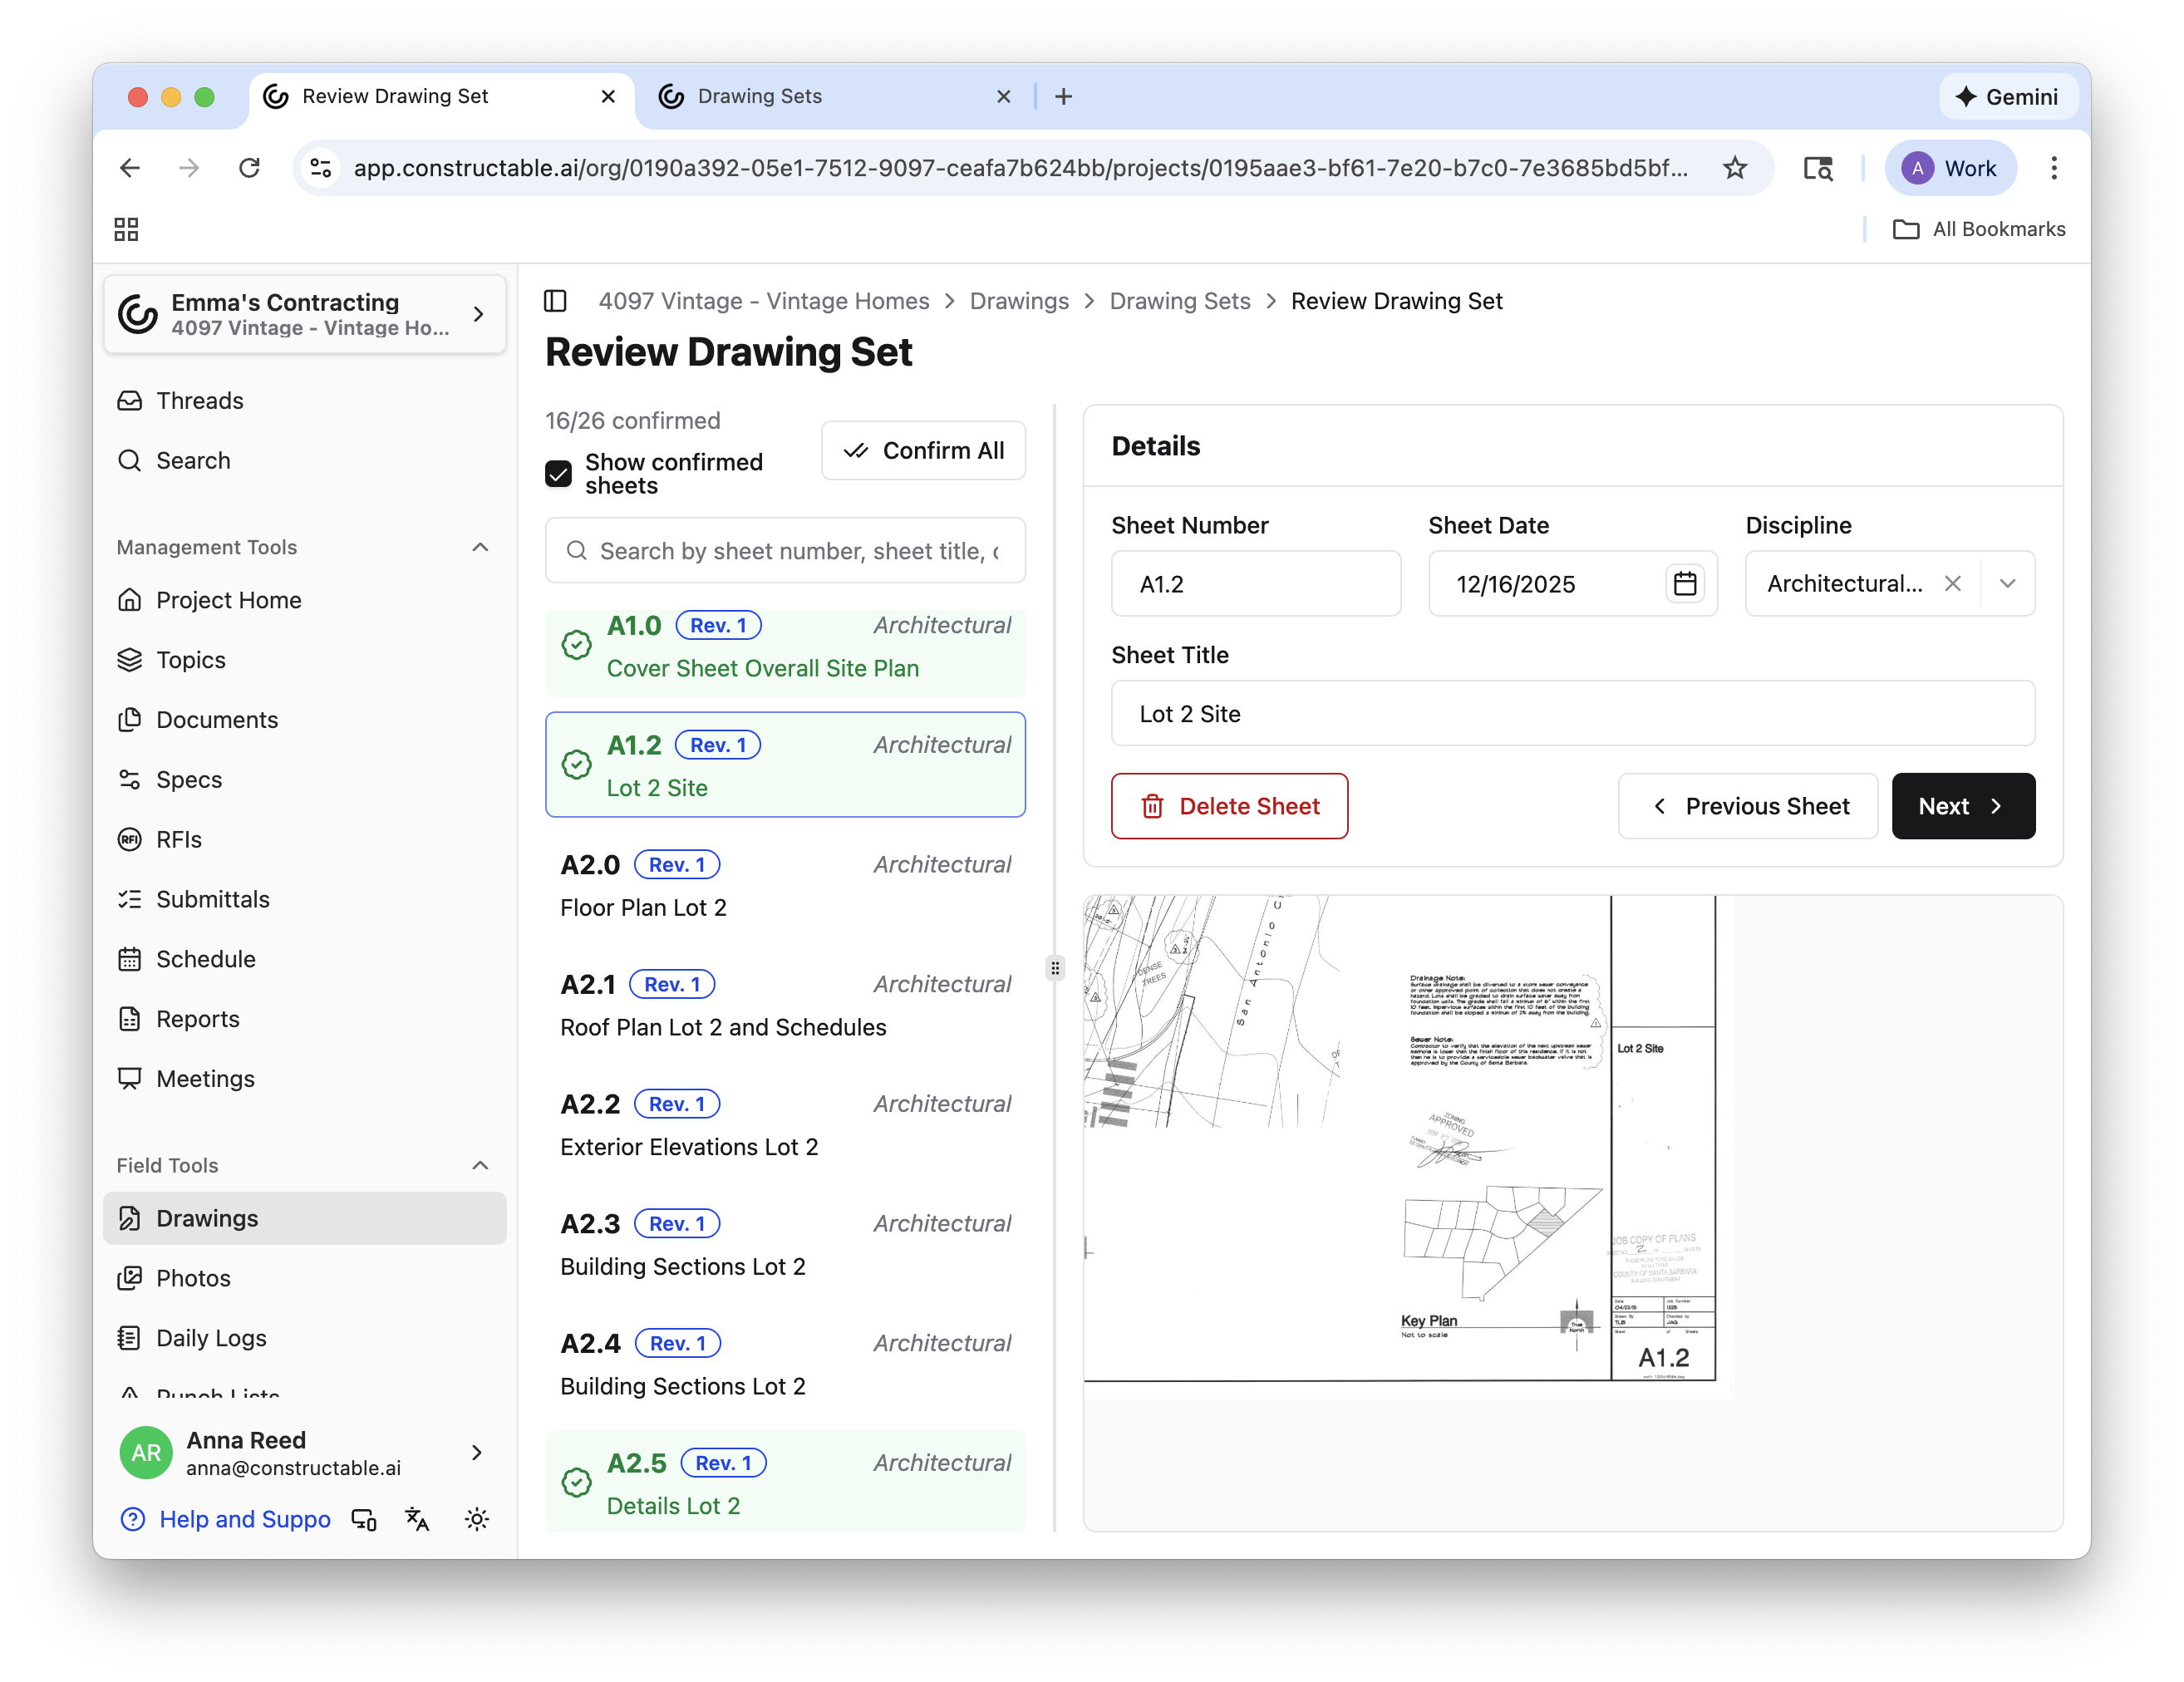
To complete the review, select Review Drawing Set. The information our software pulls from the sheets during the processing stage includes Sheet Number, Sheet Date, Discipline, and the Sheet Title. To publish the drawing set, you'll need to review each sheet individually and confirm that the information our software has pulled is correct. To make the process as quick as possible, the section of each sheet from which the information is pulled will be zoomed in.
Note: Understanding the date of each sheet requires context that AI cannot interpret. Because of this, you must manually enter the sheet date when reviewing the drawing sets. If the date is the same across the board, save time after review by clicking: Open Drawing Set -> Bulk Actions -> Edit All Sheet Dates -> Select Date -> Save.
If you would like to create your own discipline, you can do so by clicking the box underneath the “Discipline” title, typing your own label in, and selecting Create “Label” or hitting Enter on your keyboard. A pop-up will appear that allows you to alter the discipline name and add an abbreviation if you so wish. Once finished, click Create. Your custom discipline will then show up similarly to the default options, and you can click Confirm and Next to save that sheet to the new discipline.
Note: If you want to add, edit, delete, or re-order disciplines after confirming and publishing a drawing set, you can do so from the main Drawings page. Select Actions -> Edit Disciplines. From there, you can add, delete, edit, or re-order the disciplines that appear in the main superset page.
Pro Tip: If you think you may have missed something, but you already selected Confirm and Next, you can go back and see all confirmed sheets by checking the box in the upper left hand corner, titled “Show confirmed sheets.” All confirmed sheets will appear in green.
Publishing
Once all the sheets in the drawing set are reviewed, they will appear in the Drawing Sets page under “Unpublished.”
If you are ready to go ahead and publish some or all of the sheets in your drawing set, select Open Drawing Set. To publish all of the sheets, select Bulk Actions -> Publish All. If you would like to only publish a selection of sheets rather than the whole set, select the sheets of interest, then click Bulk Actions -> Publish # Selected. You are also able to select an individual sheet by clicking the three dots on the far right and selecting Publish.
And that's it—you've officially imported and shared Drawings for your whole project team to see!