Using Quality Lists
Last updated: February 1, 2026
Overview
Quality Lists provide a flexible way to track, assign, and resolve work items throughout a project’s lifecycle—not just at closeout. While traditional punch lists are supported, Quality Lists can also be used for observations, incidents, to-do items, and other task-based workflows that require visibility, accountability, and follow-through.
This article covers how to create and manage quality lists, add and update items, assign responsibility, track status changes, and collaborate through comments and drawings. By using Quality Lists consistently, teams can clearly communicate what needs attention, who is responsible, and when items are ready for review or completion—whether they’re managing final punch work, documenting observations, or coordinating day-to-day tasks in the field.
Creating a Quality List
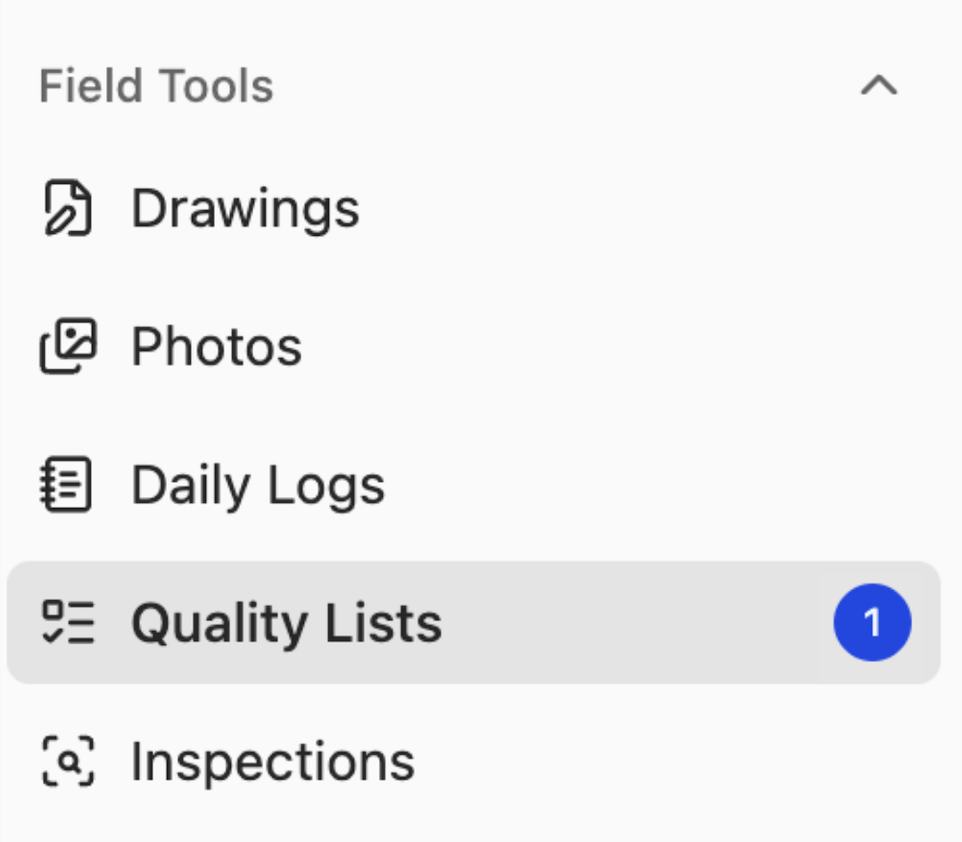
Find the Quality Lists workflow under the “Field Tools” section of the sidebar, directly under Daily Logs.
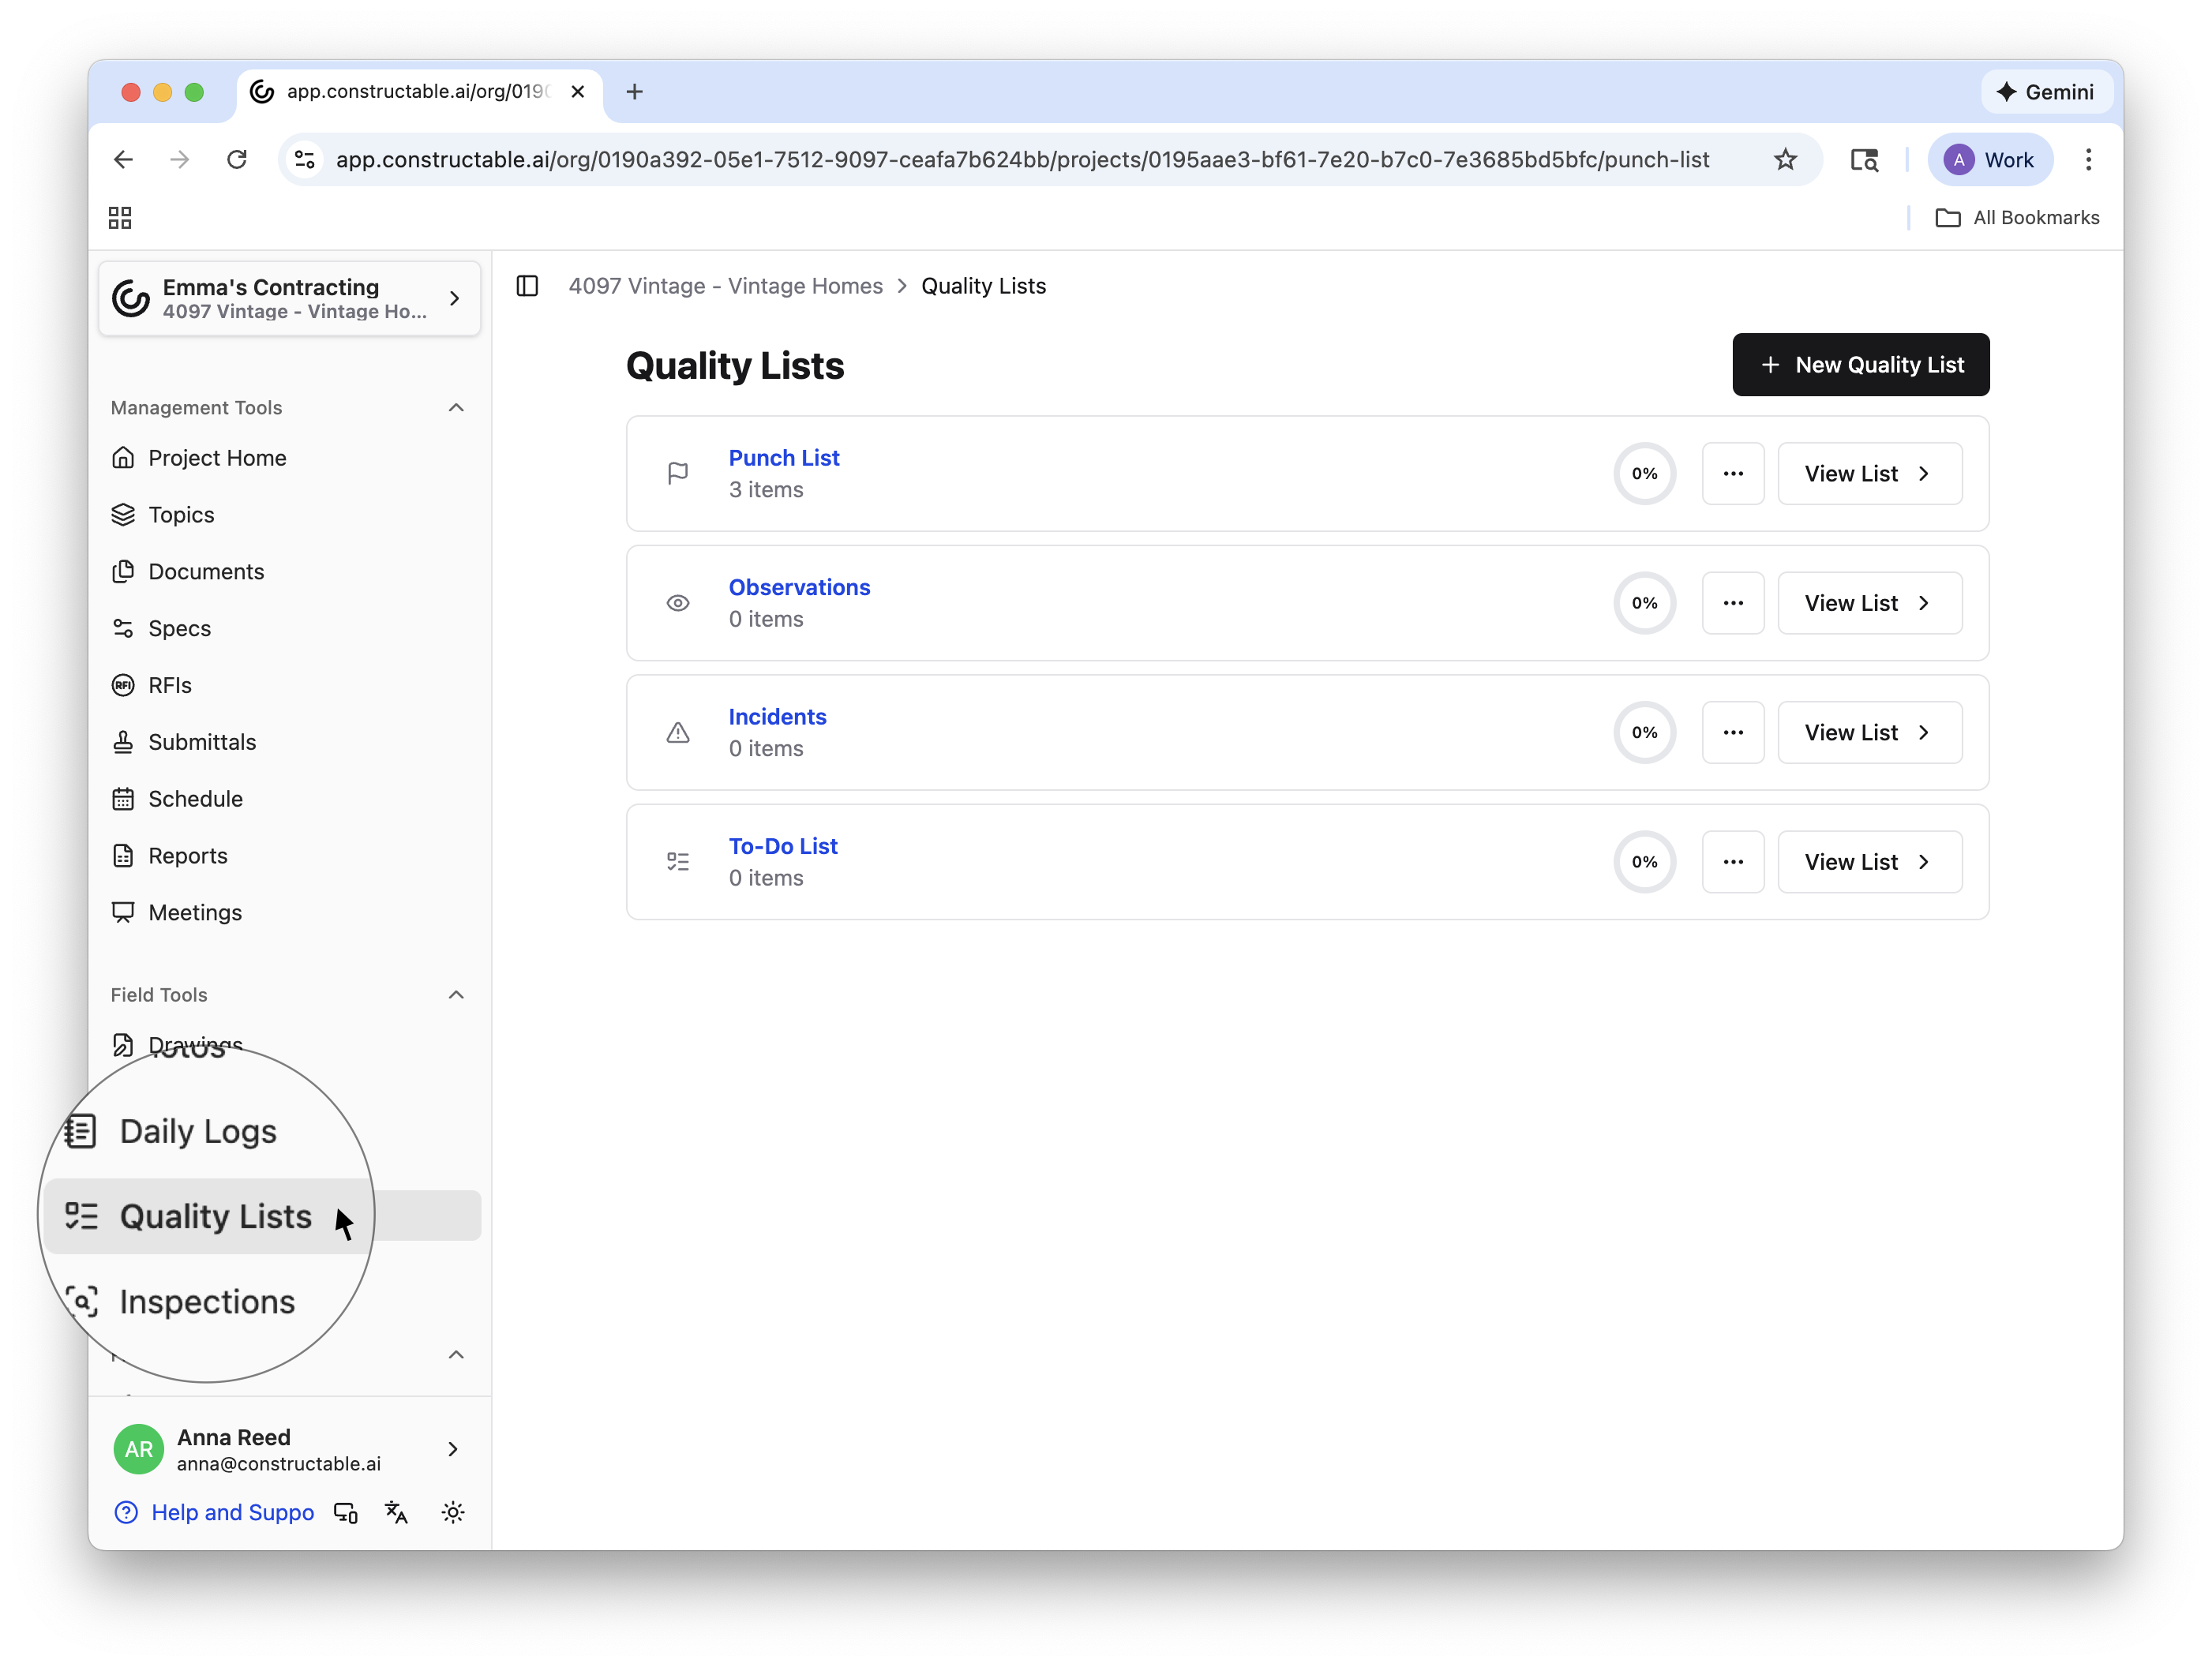
As shown in the above image, there are 4 types of quality lists you can utilize:
Punch List
Observations
Incidents
To-Do List
These four lists will be created for you when you open a new project. You can add items to these existing lists or create your own. To open an existing list, select the blue 'Name of List' or click View List. To create a new quality list, select + New Quality List, select your desired List Type, add a title, and click Create Quality List.
This will take you to the home page for that specific list. To add items to the list, select + Add Item. Fill out as much or as little detail as you’d like. The only requirement is to create an “Item Title.”
All details that can be included are:
Item Title (required): A short and clear summary of the item
Full Item Description: Use the rich text editor for an in-depth description of the item (@mentions, bold, bullet points, lists, etc)
Assignee: Select who should work on the item
Subscribers: Pick who you'd like to have access to this item
Note: Any @mentions in either the item description or the comment thread will automatically add the subscriber so they have access to that item—no need to manually add that person as a subscriber if you @mention them!
Approver: Choose who will sign off on the work (the default is whoever created the item, in this case, you, but this can be changed by adding someone else from your team here)
Start / Due Dates: Set expectations and timelines
Trade: Choose the relevant trade or vendor
Note: A trade is added when a company is added to the Global Directory (Company Menu > Global Directory). You can also edit or add trades in your Organization Settings (Company Menu > Organization Settings > Trades > Edit).
Location: Select from your project’s location list (see the following section for a more in-depth description of project locations)
Attachments: Choose or drag and drop files to provide relevant documentation of the item
Pro Tip: To save time, input a detailed item description, click the purple Autofill from Description, and the title, location, and trade will auto-populate. If you’re in our mobile app, you can use voice-to-text to enter the item description for even quicker results.
Save or Add Dependent to save the item. Adding a dependent opens a new item form that is attached to the previous one. Fill out the new item and Save. You can also add a dependent item after the fact, by selecting an existing item, clicking Edit in the overview section, then selecting Dependent On. Select the other item that the open one is dependent on, then click Save. Items linked by dependency will have a hyperlink you can click to go to the preceding task.
Note: You can pin new and existing quality list items directly on sheets within the drawing viewer. All items created in the drawing viewer will automatically be added to the corresponding list in the Quality Lists workflow.
Locations
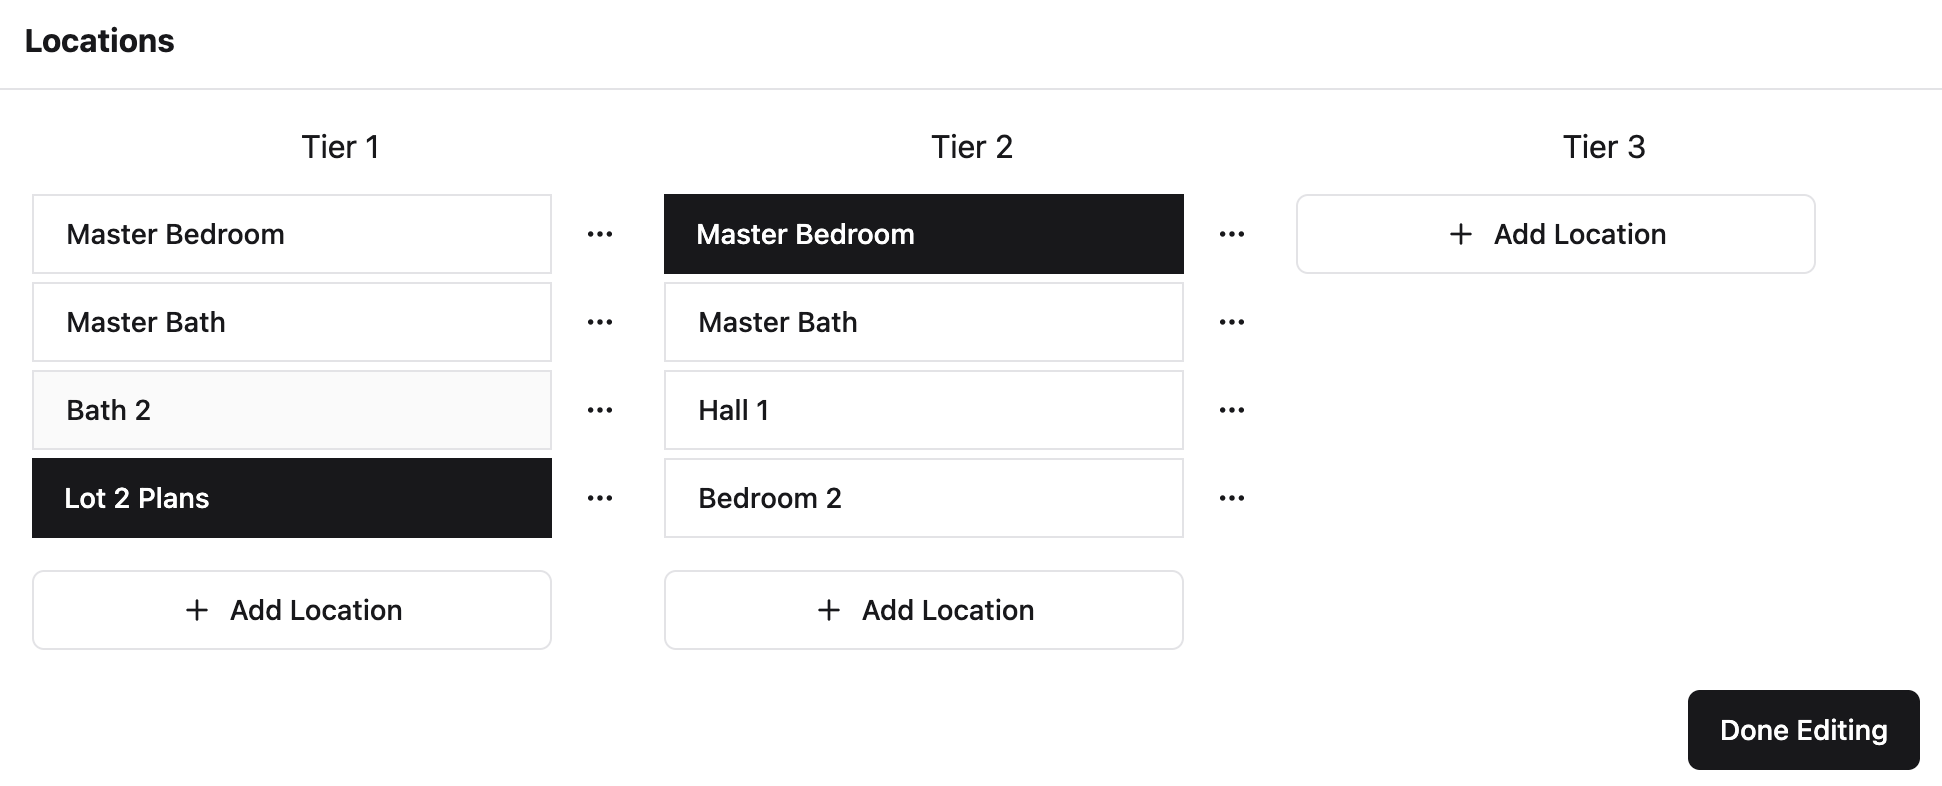
Locations can be added, deleted, or changed from Project Home > Settings. Locations are very customizable depending on your project. Create up to 5 Tiers in a single project to delineate different locations.
Updating Status
The status of a quality list item can be updated in several ways and locations. You can select from a few options: Open, In Review, Rejected, or Completed.
Open: The item is ready to be worked on
In Review: The work is complete and awaiting approval
Rejected: The work needs to be redone
Completed: The work is approved and closed
Note: A saved item defaults to being Open.
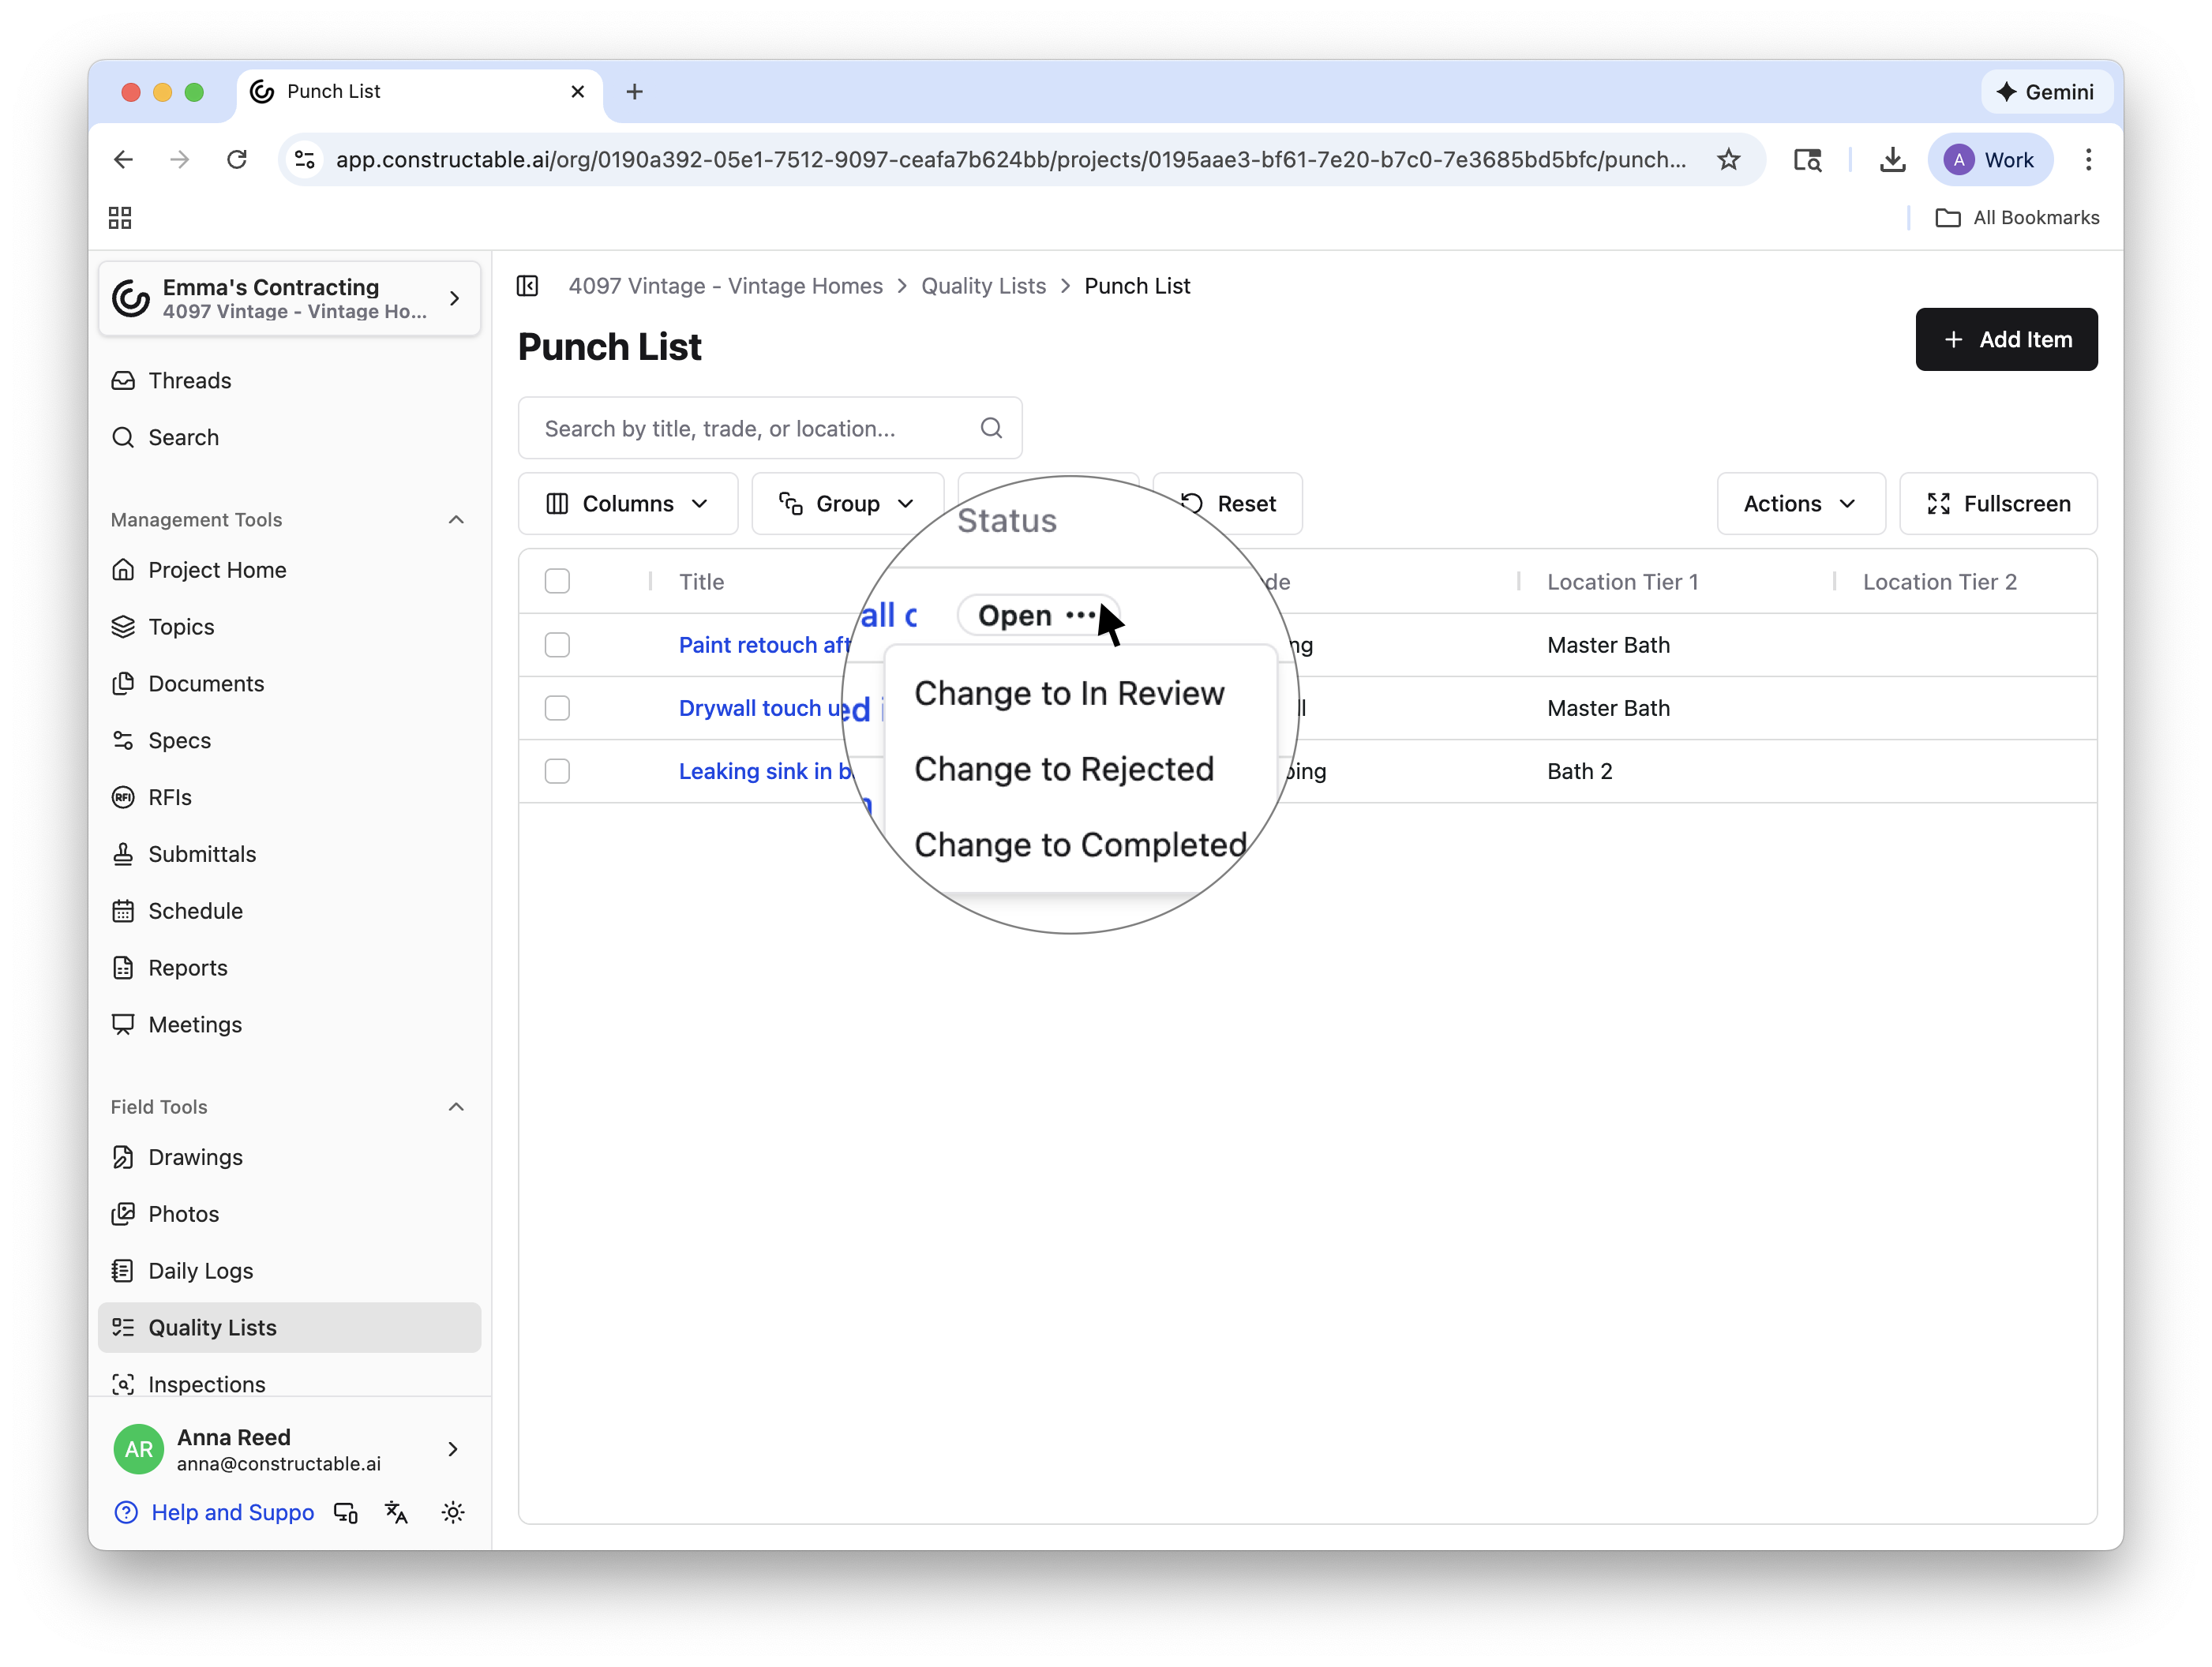
The quickest way to change an item's status is in the list view for that list. Under the "Status" column, select the three dots next to the status for an individual item, and you can either: Change to In Review, Change to Rejected, or Change to Completed.
The next way to update an item's status is also available in the list view. Select the title of the item (in blue), and a menu appears in which you can edit key information, including the status. In the upper left of that menu, you can see the item's current status. Click on the drop-down and select from the three options.
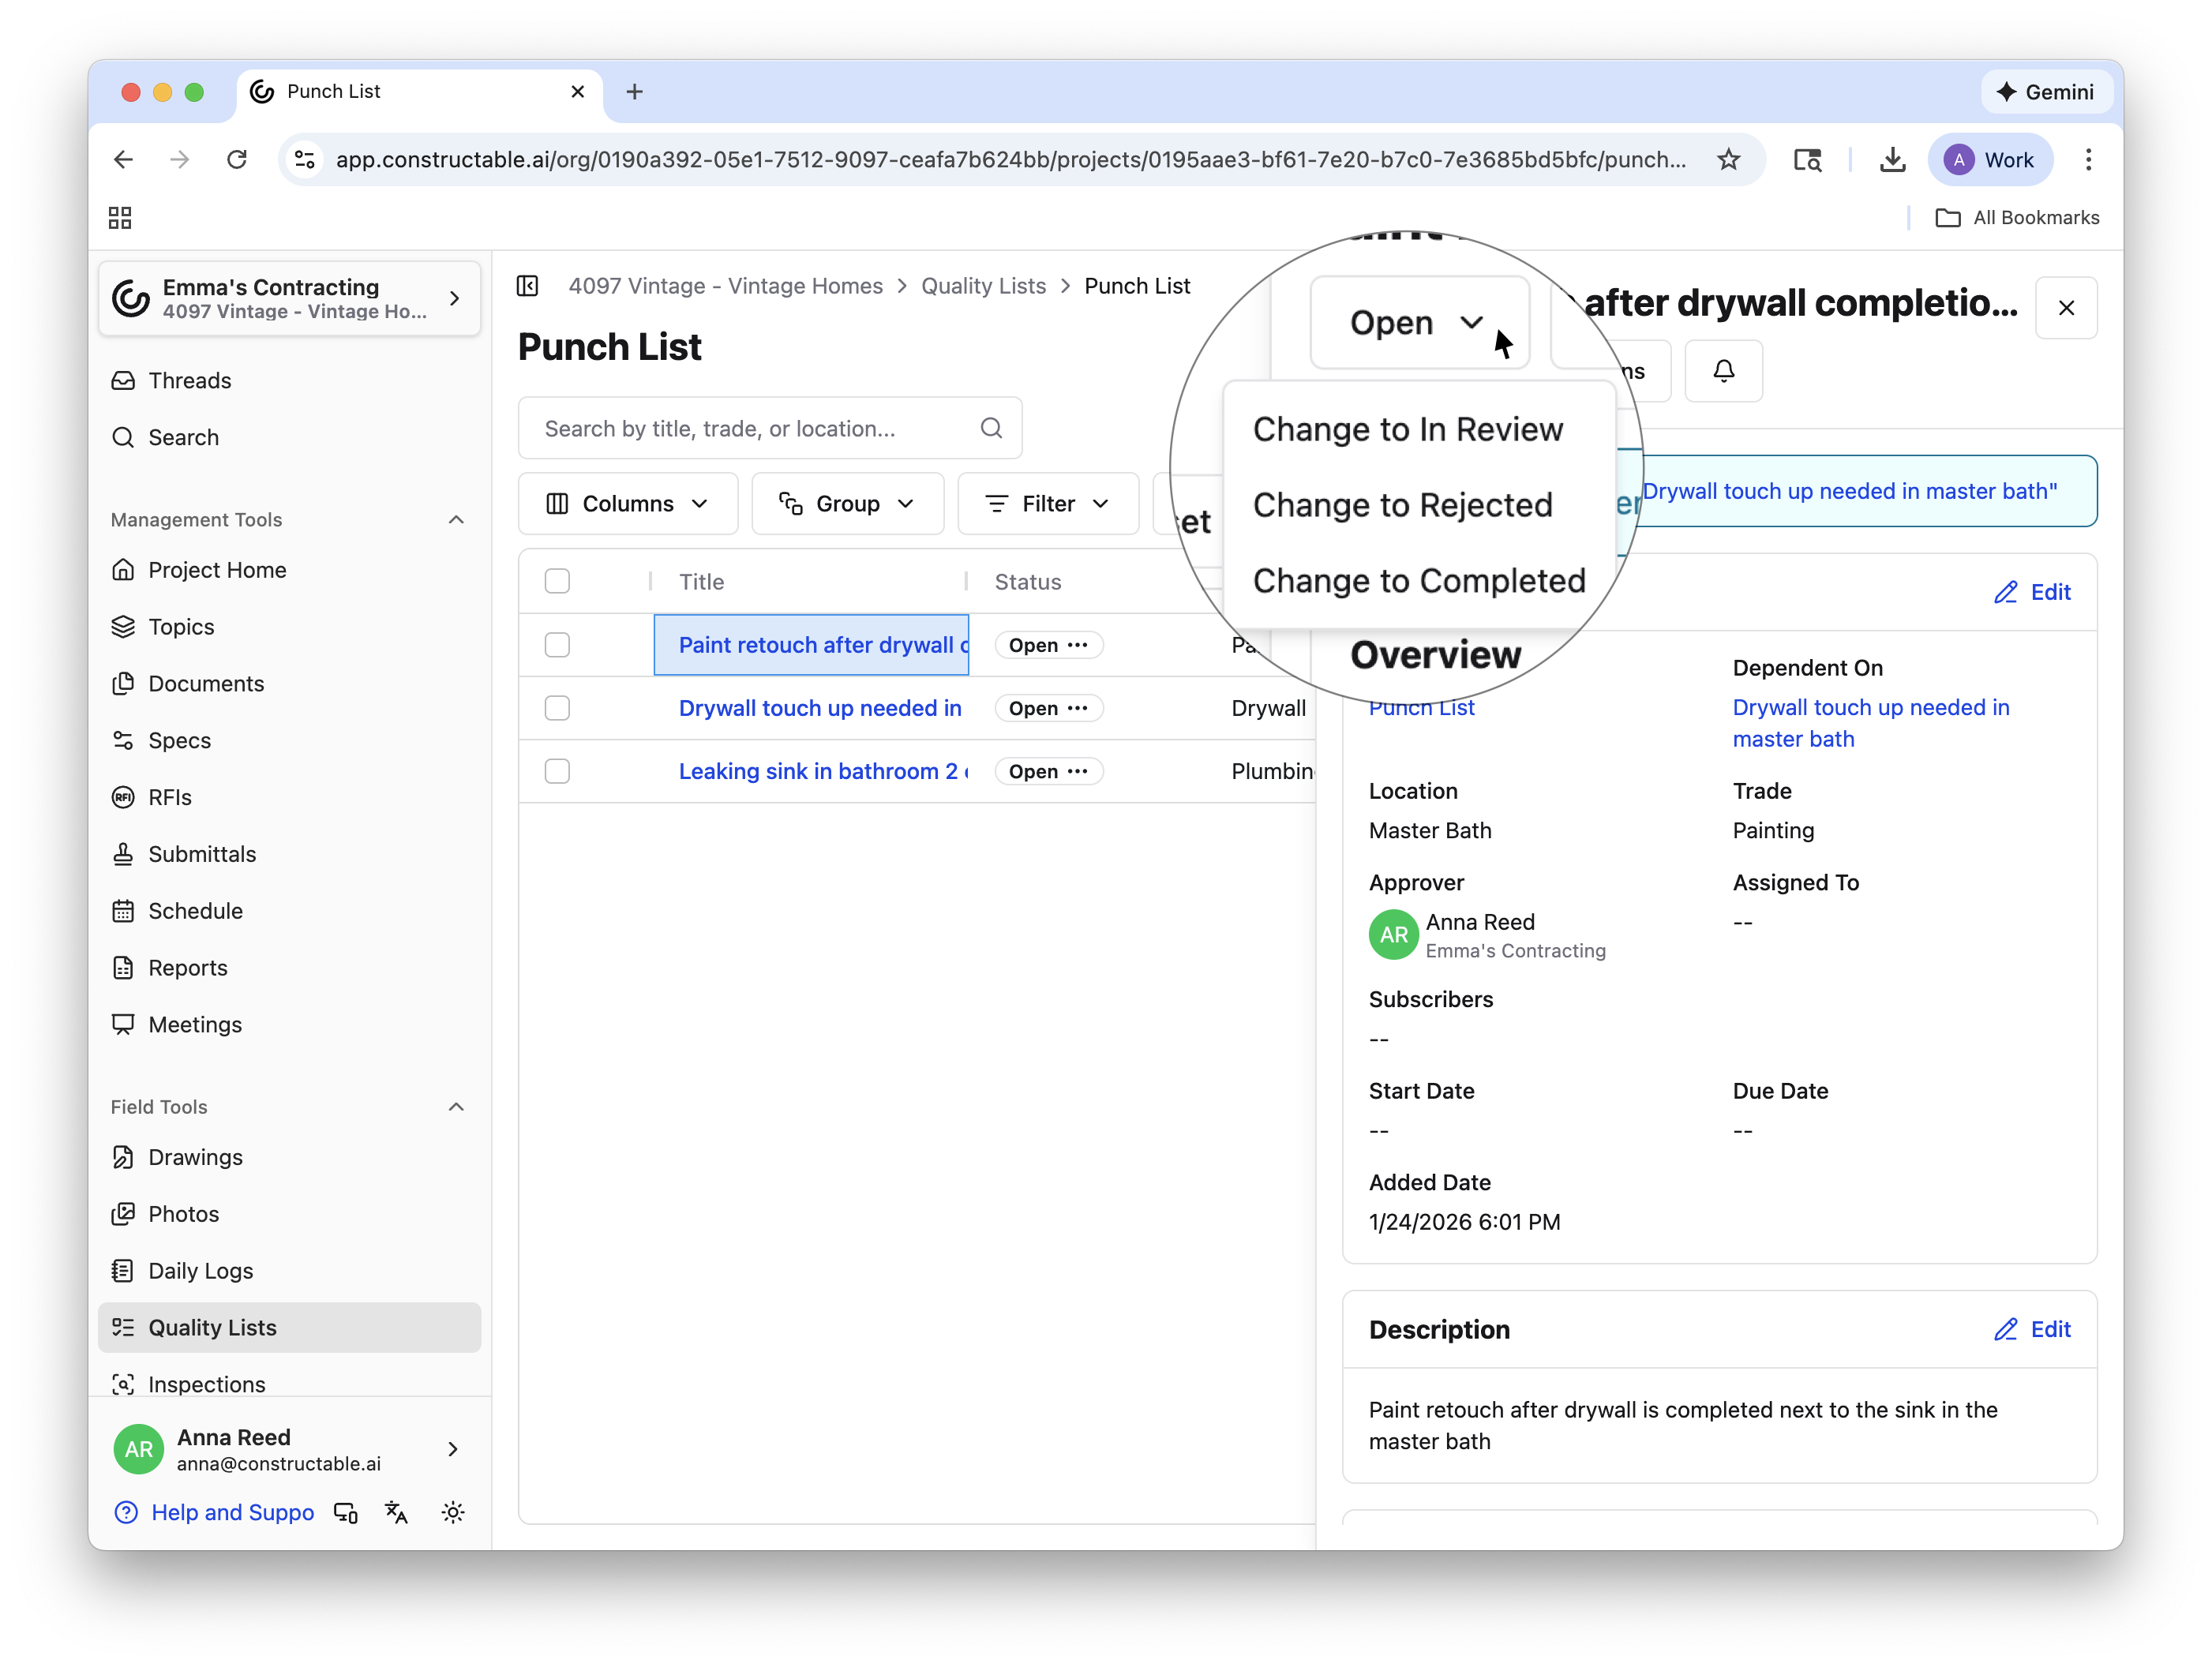
Note: You can also add comments to items from this menu. Any time this menu appears, scroll down to the "Comments" section, click + Start Thread, type your note (you can use @mentions to notify teammates), and click Post Comment to save.
The third way to update the status of items in the list view is to select the Actions drop-down. First, select the items you wish to bulk edit (by clicking the boxes on the far left column), and select Actions > Edit Status. Search or select an option from the drop-down menu.
Note: If you don't select any boxes, any bulk action will apply to all items in the list.
The final way to update an item's status is in the drawing viewer. Select a punch item pin > View Full Item Details, and the menu appears from the list view in Quality Lists. From here, you can update the status in the upper left corner, edit any other information, and add comments.
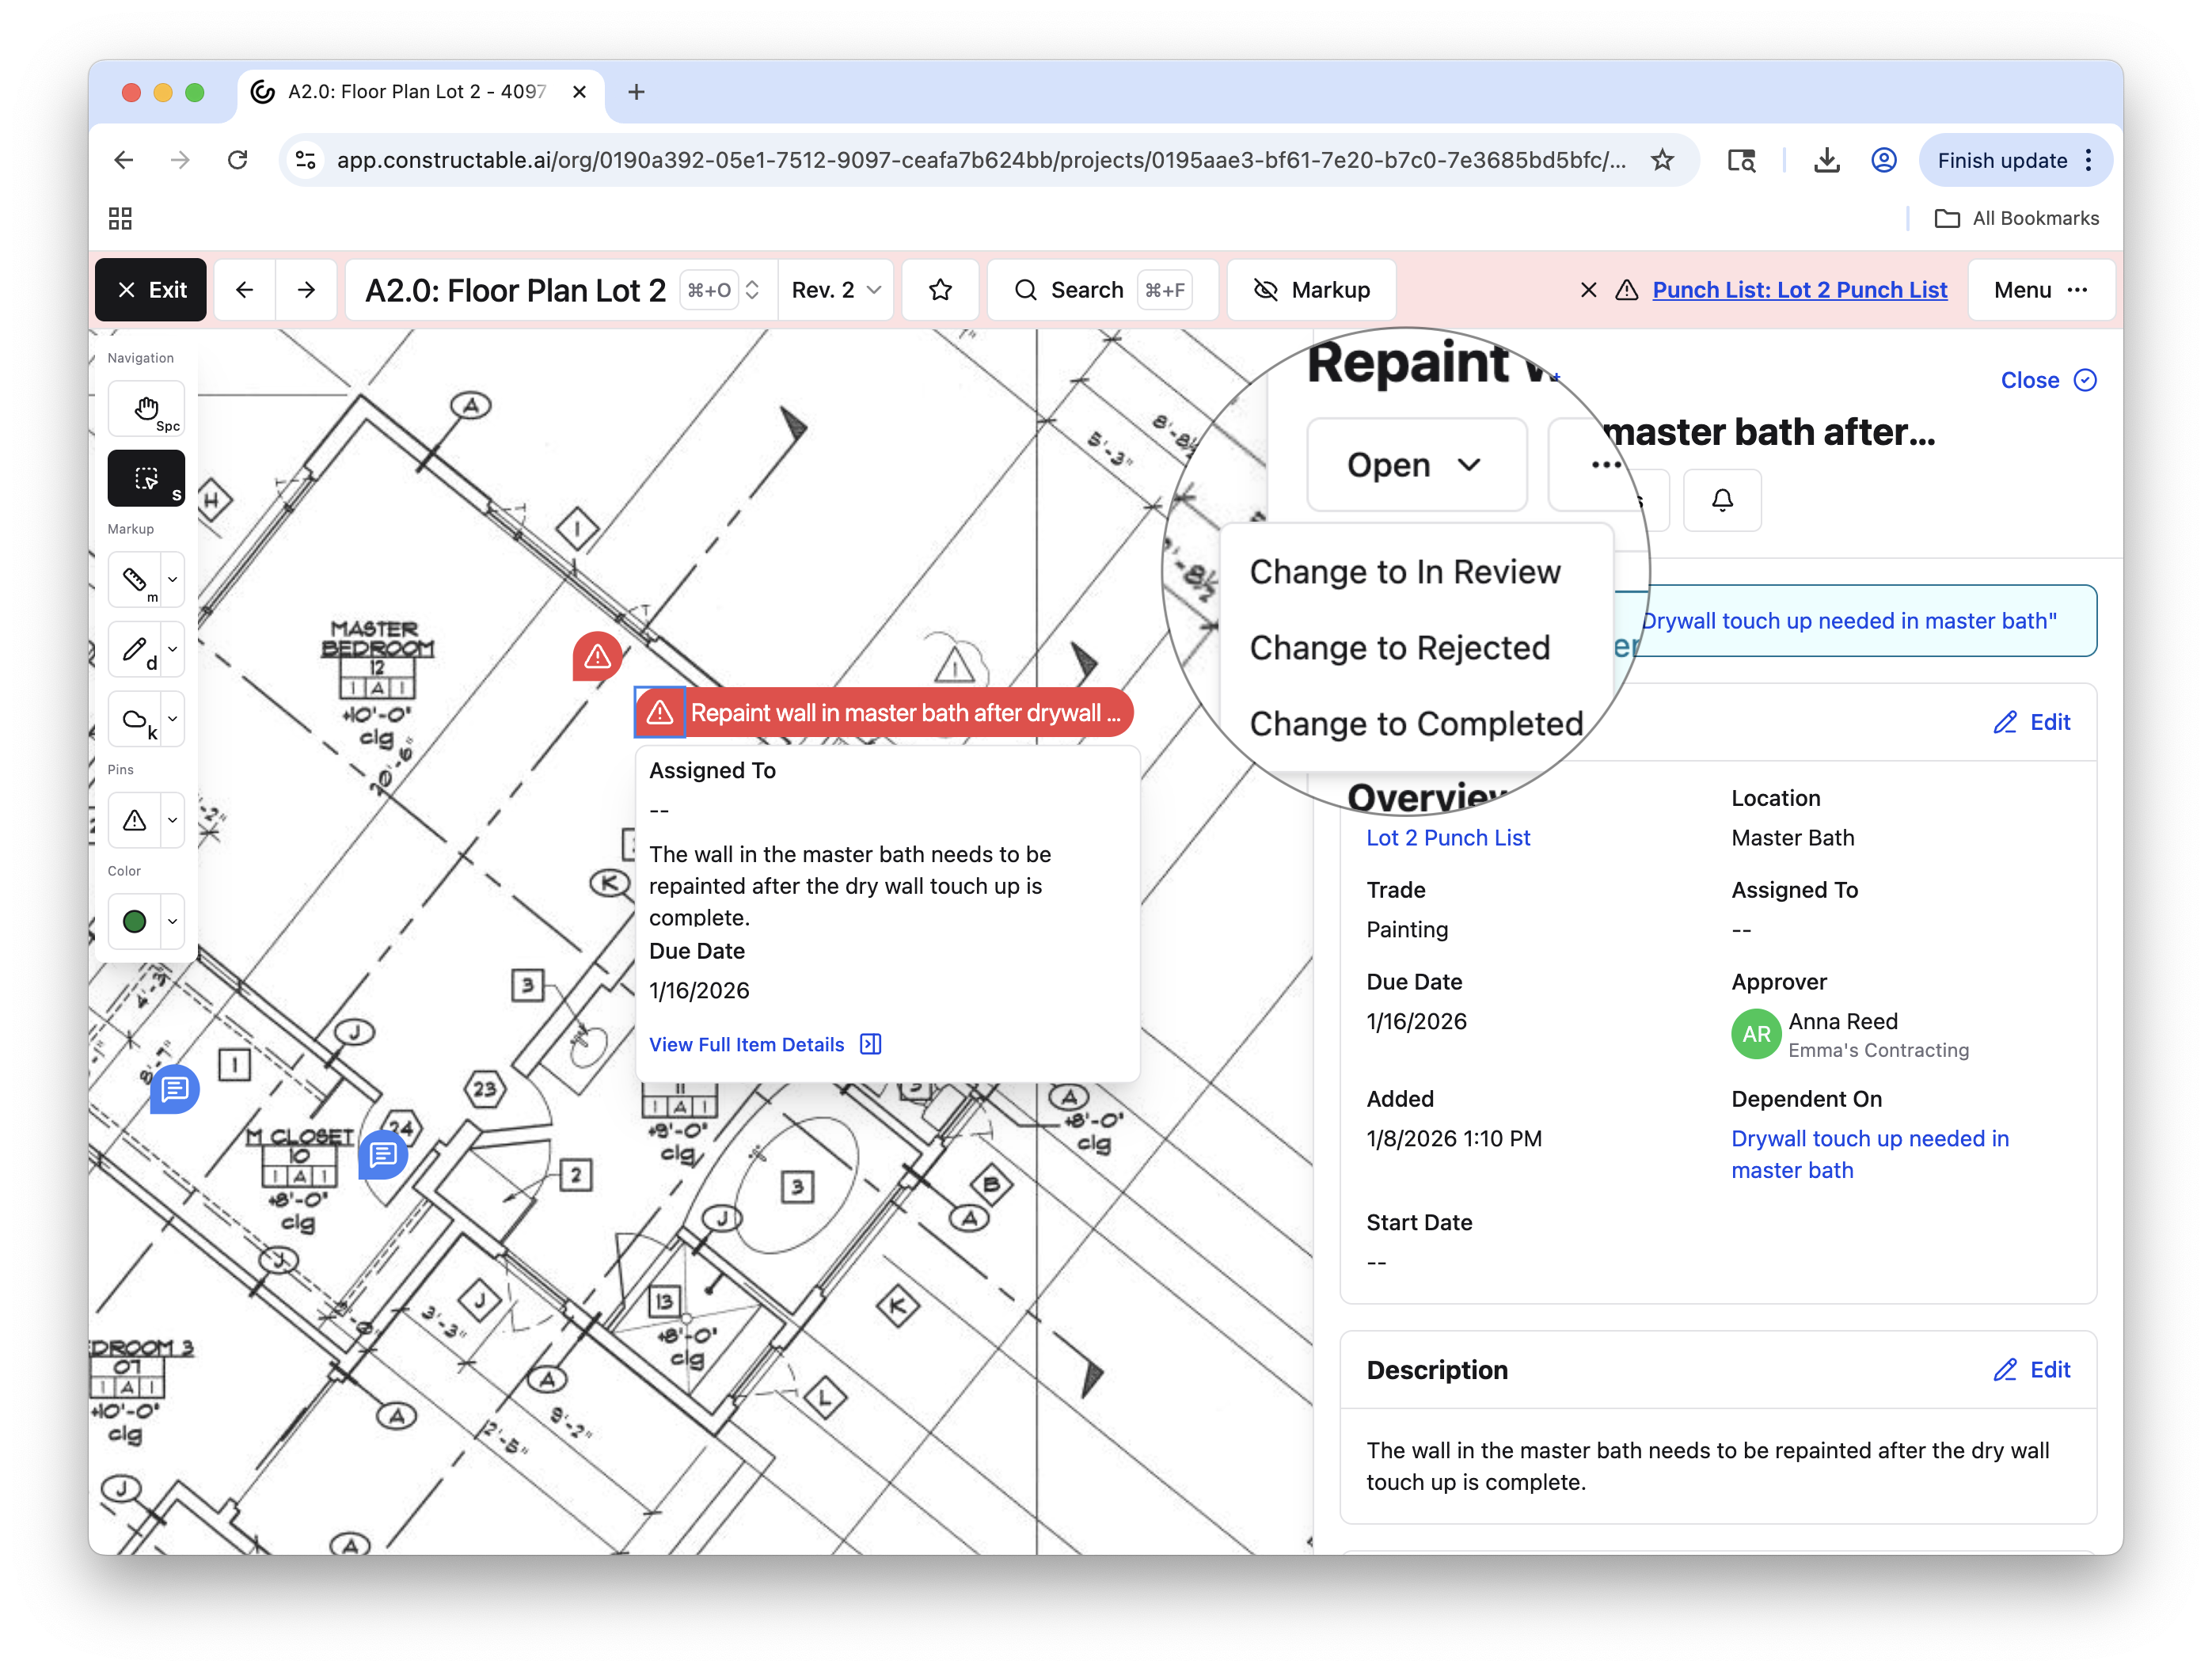
Note: While items usually move Open → In Review → Completed, users can return any item to Open or be Rejected.
Notifications
When a quality list item is created and saved, assignees will be notified. When an item is moved to In Review, approvers will be notified. Don't worry—assignees will not receive multiple emails—all items are bundled and grouped in their notification email. All unread notifications will also appear as a blue circle next to the Quality Lists tab.
Read more on notification preferences across Constructable here: 📄 Notification Preferences
Other Actions
In addition to adding new lists from our main Quality Lists page, you can see the completion status for a list as well as edit, archive, and delete it. Once you open a specific list, you can also change the viewing options and use bulk actions for that particular list.
Completion Status
When an item or task is marked as completed, the progress ring on the main page will update to reflect the progress made.
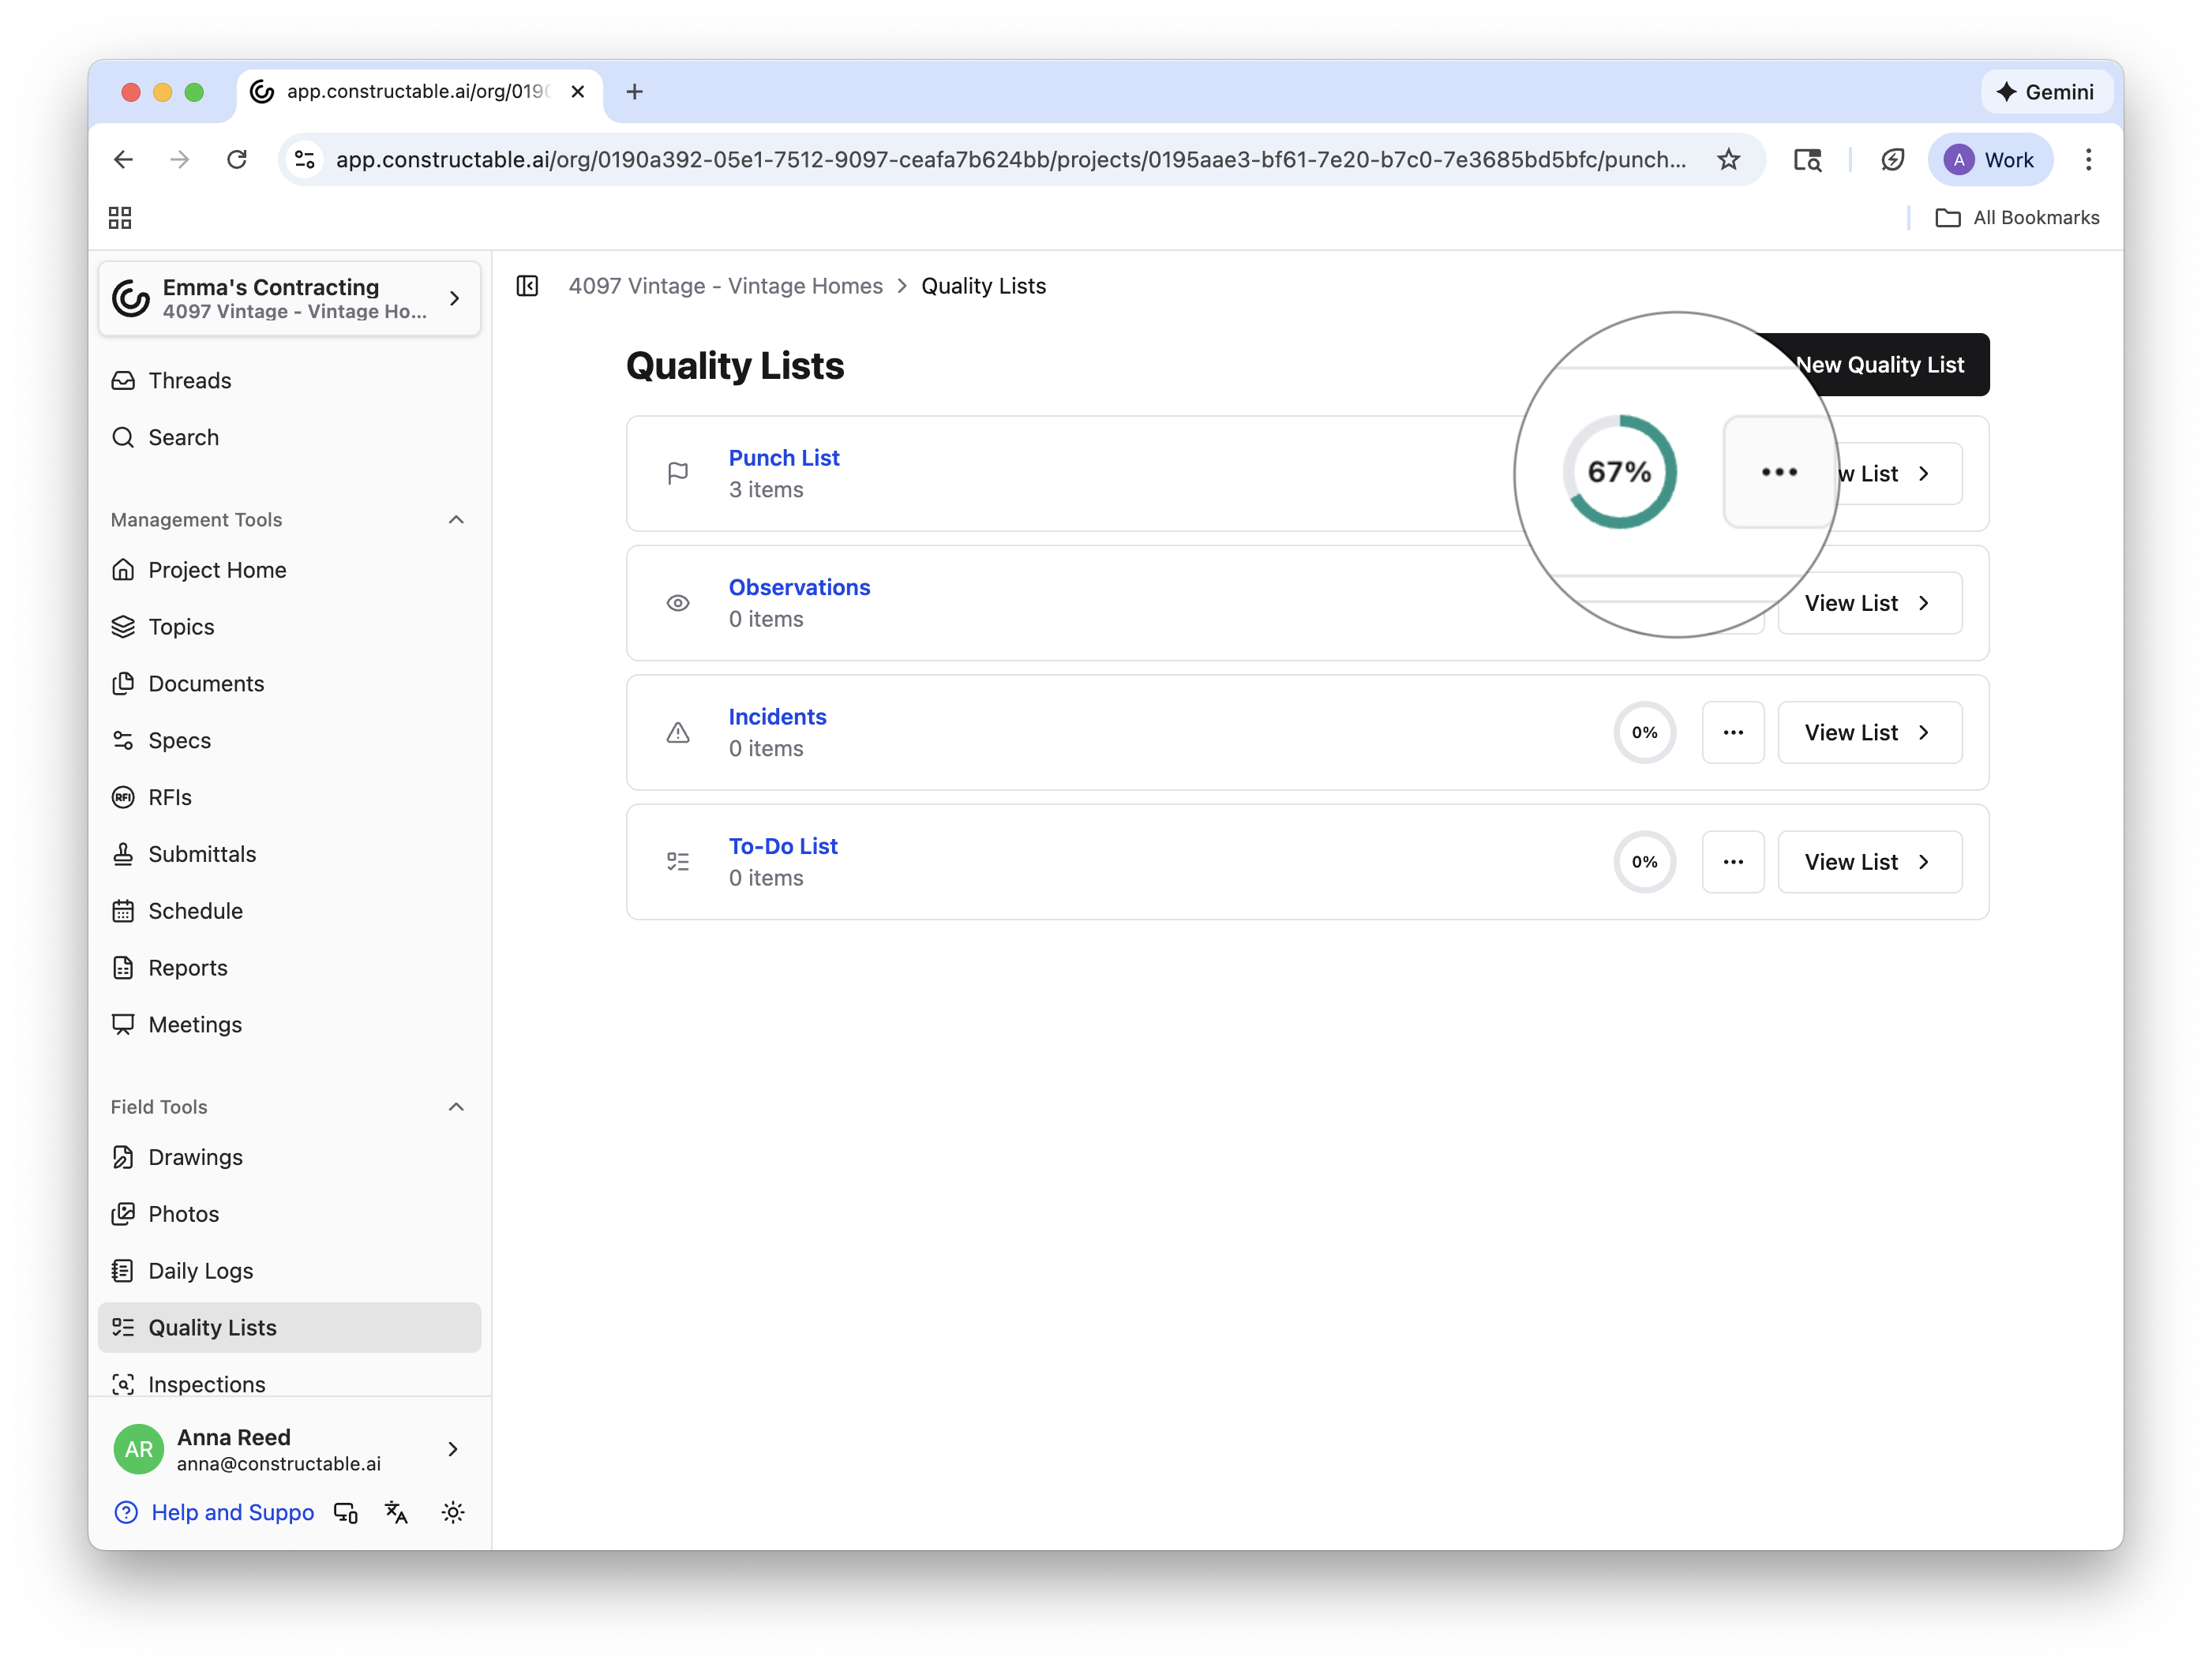
Note: The progress ring is tailored to the individual. If you have access to only 3 of the 30 items on a list and complete them, your progress ring will update to 100%. The progress ring for someone else on the same list, however, may be different.
Editing, Archiving, Deleting
Right next to the progress ring is a 3-dot button. Select this, and choose to Edit List, Archive List, or Delete List.
Editing a list will allow you to change the List Type as well as the name of the list
Archiving a list after it's been completed allows you to de-clutter your Quality Lists workflow and ensure all relevant lists are at the top
Don't worry, you can always Unarchive if you need to by going through the same process!
Deleting a list will permanently clear it from your Quality Lists workflow
Viewing Options
Within individual lists, you can also change which columns appear for your list view, group items in a number of different ways, and filter items in several ways.
Choose from any number of options to filter, view, and group quality list items!
Bulk Actions
Select any number of items in the boxes in the far-left column, then click Actions to bulk edit and download the list.
The options for bulk edits are:
Edit Due Date
Edit Assignee
Edit Approvers
Edit Status
Edit Trade
Select any of these options and search or use the dropdown to find the desired edit.
Aside from bulk edits, you can download the entire list—or a select few items—as a PDF or a CSV file. When exporting a list as a PDF, you can choose to download the photos attached to items. Actions > Download as PDF > Select all, or Deselect all > Download PDF. To export a CSV, select Download as CSV from the Actions dropdown. Photos will not download to the CSV file.
You can also download a PDF with a QR code for every location tagged in a list. Locate the option just below the one to download the list as a CSV; it exports a PDF with one QR per page for each location.
Permissions
If you are struggling to manage or view certain items, it's likely you do not have the required permissions. As a general rule, only internal teams (admins, PMs, employees) can manage all items in Quality Lists. External users can see items assigned to them. If you have any questions about this or are unsure, reach out to your Manager or Admin.
Frequently Asked Questions
What's the difference among the different Quality List types?
Each list type (Punch List, Observations, Incidents, To-Do List) uses the same underlying structure but is intended to support different workflows. List types help teams categorize work and align on intent, but all lists can be customized and used flexibly based on project needs.
Do list types affect permissions, statuses, or notifications?
No. All Quality List types share the same status options, notification behavior, and permission rules. The list type is primarily for organization and clarity—not functionality.
Who can see items on a Quality List?
Visibility depends on user permissions and item assignment. Internal team members can typically view and manage all items, while external users can see items assigned to them or where they are included as subscribers.
What happens if I'm only assigned a few items on a large list?
You will only have visibility access to items you’ve been assigned to or are listed as a subscriber on. Your progress ring reflects only those items, so even if a list contains many items, your completion percentage is calculated based on the items visible to you.
Are items created in the drawing viewer different from those created in the Quality Lists workflow?
No. Items created or pinned in the drawing viewer are automatically added to the Quality Lists workflow and behave the same as items created directly in the list.